ib 277698 plbs2a1 lb5 - kompernass.com · pt tradução do manual de instruções original página...
TRANSCRIPT
IAN 277698
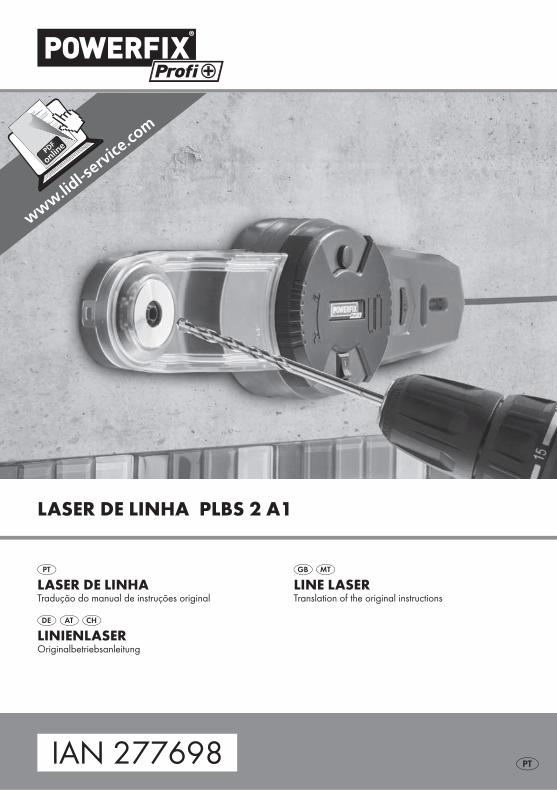
LASER DE LINHA PLBS 2 A1
LINE LASERTranslation of the original instructions
LASER DE LINHATradução do manual de instruções original
LINIENLASEROriginalbetriebsanleitung

PT Tradução do manual de instruções original Página 1GB / MT Translation of the original instructions Page 11DE / AT / CH Originalbetriebsanleitung Seite 21
Antes de começar a ler abra na página com as imagens e, de seguida, familiarize-se com todas as funções do aparelho.
Before reading, unfold the page containing the illustrations and familiarise yourself with all functions of the device.
Klappen Sie vor dem Lesen die Seite mit den Abbildungen aus und machen Sie sich anschließend mit allen Funktionen des Gerätes vertraut.

PT │ 1 ■PLBS 2 A1
ÍndiceIntrodução . . . . . . . . . . . . . . . . . . . . . . . . . . . . . . . . . . . . . . . . . . . . . . . . . . . . . . . 2Utilização correta . . . . . . . . . . . . . . . . . . . . . . . . . . . . . . . . . . . . . . . . . . . . . . . . . . . . . . . . . . . . 2Equipamento . . . . . . . . . . . . . . . . . . . . . . . . . . . . . . . . . . . . . . . . . . . . . . . . . . . . . . . . . . . . . . . 2Conteúdo da embalagem . . . . . . . . . . . . . . . . . . . . . . . . . . . . . . . . . . . . . . . . . . . . . . . . . . . . . 2Dados técnicos . . . . . . . . . . . . . . . . . . . . . . . . . . . . . . . . . . . . . . . . . . . . . . . . . . . . . . . . . . . . . . 2
Instruções de segurança . . . . . . . . . . . . . . . . . . . . . . . . . . . . . . . . . . . . . . . . . . . 3Segurança no local de trabalho . . . . . . . . . . . . . . . . . . . . . . . . . . . . . . . . . . . . . . . . . . . . . . . . 3Segurança elétrica . . . . . . . . . . . . . . . . . . . . . . . . . . . . . . . . . . . . . . . . . . . . . . . . . . . . . . . . . . . 3Segurança de pessoas e códigos de boa conduta específicos em matéria de laser . . . . . . . . 3Utilização e manuseamento do aparelho . . . . . . . . . . . . . . . . . . . . . . . . . . . . . . . . . . . . . . . . . 4Utilização e manuseamento das pilhas . . . . . . . . . . . . . . . . . . . . . . . . . . . . . . . . . . . . . . . . . . . 4Instruções de segurança específicas do aparelho . . . . . . . . . . . . . . . . . . . . . . . . . . . . . . . . . . . 5
Antes da colocação em funcionamento . . . . . . . . . . . . . . . . . . . . . . . . . . . . . . . 6Inserir/substituir pilhas . . . . . . . . . . . . . . . . . . . . . . . . . . . . . . . . . . . . . . . . . . . . . . . . . . . . . . . . 6Utilizar a tampa de proteção/o suporte de parede . . . . . . . . . . . . . . . . . . . . . . . . . . . . . . . . . 6Preparação do aparelho . . . . . . . . . . . . . . . . . . . . . . . . . . . . . . . . . . . . . . . . . . . . . . . . . . . . . . 6
Colocação em funcionamento . . . . . . . . . . . . . . . . . . . . . . . . . . . . . . . . . . . . . . . 6Ativação e desativação do laser de linhas . . . . . . . . . . . . . . . . . . . . . . . . . . . . . . . . . . . . . . . . 6Alinhamento do laser de linhas . . . . . . . . . . . . . . . . . . . . . . . . . . . . . . . . . . . . . . . . . . . . . . . . . 6Utilização do coletor de pó de perfuração . . . . . . . . . . . . . . . . . . . . . . . . . . . . . . . . . . . . . . . . 7Esvaziamento do coletor de pó de perfuração . . . . . . . . . . . . . . . . . . . . . . . . . . . . . . . . . . . . . 7Aspiração do aparelho . . . . . . . . . . . . . . . . . . . . . . . . . . . . . . . . . . . . . . . . . . . . . . . . . . . . . . . 7Remoção do aparelho . . . . . . . . . . . . . . . . . . . . . . . . . . . . . . . . . . . . . . . . . . . . . . . . . . . . . . . . 8
Resolução de falhas . . . . . . . . . . . . . . . . . . . . . . . . . . . . . . . . . . . . . . . . . . . . . . . 8
Manutenção e limpeza . . . . . . . . . . . . . . . . . . . . . . . . . . . . . . . . . . . . . . . . . . . . . 8
Armazenamento . . . . . . . . . . . . . . . . . . . . . . . . . . . . . . . . . . . . . . . . . . . . . . . . . . 8
Eliminação . . . . . . . . . . . . . . . . . . . . . . . . . . . . . . . . . . . . . . . . . . . . . . . . . . . . . . . 8
Garantia da Kompernass Handels GmbH . . . . . . . . . . . . . . . . . . . . . . . . . . . . . 9Assistência Técnica . . . . . . . . . . . . . . . . . . . . . . . . . . . . . . . . . . . . . . . . . . . . . . . . . . . . . . . . . . 10Importador . . . . . . . . . . . . . . . . . . . . . . . . . . . . . . . . . . . . . . . . . . . . . . . . . . . . . . . . . . . . . . . . 10
■ 2 │ PT PLBS 2 A1
LASER DE LINHA PLBS 2 A1
Introdução Parabéns pela compra do seu novo apare-
lho. Optou por um produto de elevada qualidade. O manual de instruções é
parte integrante deste produto. Este contém instru-ções importantes para a segurança, utilização e eliminação. Antes de utilizar o produto, familiarize--se com todas as instruções de operação e segu-rança. Utilize o produto apenas como descrito e nas áreas de aplicação indicadas. Ao transferir o produto para terceiros, entregue todos os respeti-vos documentos.
Utilização corretaO laser de linhas com coletor de pó de perfuração é um aparelho alimentado por pilha, que, através da tecnologia de vácuo, pode ser aspirado numa superfície de parede interna comum. Este aparelho pode ser utilizado para a projeção de uma linha de laser numa parede e para a recolha do pó de perfuração, ao executar um furo com um diâmetro máx. de 10 mm. Não utilize o aparelho para tra-balhos acima do nível da cabeça. Qualquer outra utilização ou alteração do aparelho é considerada incorreta e acarreta perigo de acidentes graves. O fabricante não se responsabiliza por quaisquer danos causados pela utilização incorreta. O apare lho não se destina à utilização comercial.
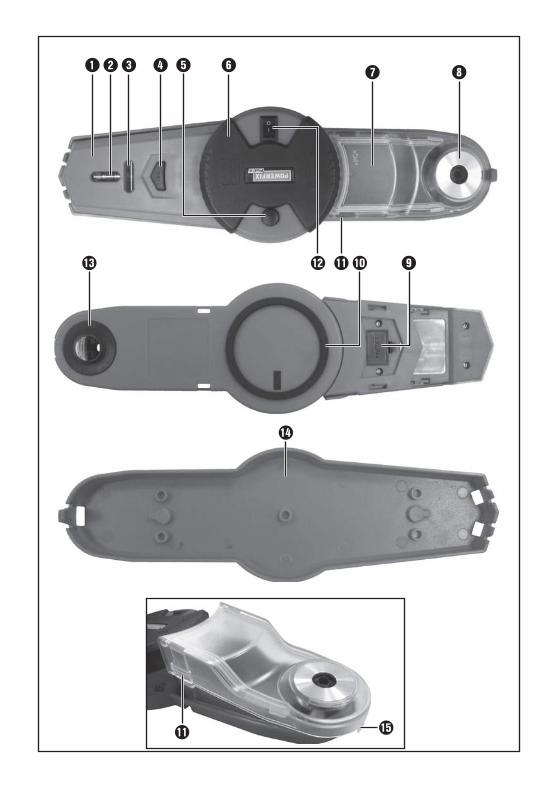
Equipamento Laser de linhas Nível de bolha horizontal Nível de bolha vertical Interruptor LIGAR/DESLIGAR do laser de linhas Botão de ventilação Compartimento das pilhas da bomba de vácuo Coletor de pó de perfuração/cobertura do coletor de pó de perfuração
Placa de proteção/encaixe para a broca Compartimento das pilhas do laser de linhas Vedação do aspirador de vácuo Desbloqueio do coletor de pó de perfuração Interruptor LIGAR/DESLIGAR / bomba de vácuo
Vedação do coletor de pó de perfuração Tampa de proteção/suporte de parede Patilha/nervura de centragem
Conteúdo da embalagem1 Laser de linha PLBS 2 A12 Pilhas de 1,5 V, tipo AA3 Pilhas de 1,5 V, tipo LR441 Manual de instruções
Dados técnicos
Laser de linhas:
Comprimento de onda do laser: 650 Nm
Potência do laser: < 1 mW
Classe de laser: 2Pilhas: 3 de 1,5 V , tipo LR44
(corrente contínua)
Níveis de bolha (horizontal e vertical):
Precisão: 0,3°
Coletor de pó de perfuração:
Diâmetro máx. da broca: 10 mm
Bomba de vácuo:
Pilhas: 2 de 1,5 V , tipo AA (corrente contínua)
PT │ 3 ■PLBS 2 A1
Instruções de segurança AVISO!
► Leia todas as instruções de segurança e indica-ções. O não cumprimento das instruções de segurança e indicações pode causar choque elétrico, incêndio e/ou ferimentos graves.
AVISO!
■ Os materiais de embalagem não podem ser utilizados para brincar. Perigo de asfixia.
NOTA
► Verifique a integralidade do produto fornecido e a existência de eventuais danos visíveis.
► Caso falte algum componente ou se verifiquem danos resultantes de embalagem defeituosa ou do transporte, contacte a linha direta de Assistência Técnica (ver capítulo Assistência Técnica).
Guarde todas as instruções de segurança e indicações para futuras consultas.
Não remova nenhumas marcações e indica-ções do aparelho.
Segurança no local de trabalho ■ Não trabalhe com o aparelho em atmosferas
potencialmente explosivas e em locais onde se encontram líquidos, gases ou poeiras inflamá-veis.
■ Mantenha crianças e outras pessoas afastadas durante a utilização do aparelho. Em caso de distração pode perder o controlo do aparelho.
■ Este aparelho pode ser utilizado por crianças com idades superiores a 8 anos, bem como por pessoas com capacidades físicas, sensoriais ou mentais reduzidas, ou com falta de experiência e/ou conhecimento, caso sejam vigiadas ou instruídas sobre a utilização segura do apare-lho e compreendam os perigos daí resultantes. As crianças não podem brincar com o apare-lho. A limpeza e a manutenção pelo utilizador não podem ser realizadas por crianças não vigiadas.
■ Observar os regulamentos relativos a segurança no trabalho e prevenção de acidentes, bem como as instruções de segurança, diretivas e políticas de proteção aplicáveis à sua atividade e ao local de trabalho.
Segurança elétrica ■ Não trabalhe com este aparelho em ambientes
húmidos ou molhados.
■ Retire as pilhas do aparelho, caso não o utilize durante um longo período de tempo.
Segurança de pessoas e códigos de boa conduta específicos em matéria de laser
■ Esteja atento, observe o que está a fazer e utilize este aparelho de forma sensata. Não utilize o aparelho se estiver cansado ou sob influência de drogas, álcool ou medicamentos. Um momento de distração durante a utilização do aparelho pode causar ferimentos graves.
■ Cuidado! Caso utilize dispositivos de comando ou de ajuste diferentes dos mencionados neste documento, ou realize outros procedimentos, poderá verificar-se um efeito perigoso de radia-ção.
■ Um laser é uma radiação de luz muito intensa. A utilização incorreta pode causar lesões graves e permanentes nos olhos e na retina.
■ Não direcionar o raio laser para pessoas ou animais.
■ Não direcionar o raio laser para superfícies refletoras; estas podem redirecionar o raio laser e pôr em risco a vida de pessoas.
■ Não trabalhe com o aparelho à altura dos olhos.
■ Não olhar diretamente para o raio ou para o raio refletido.
■ Se a radiação laser atingir o olho, fechar cons-cientemente os olhos e mover imediatamente a cabeça para longe do raio.
■ Não utilizar instrumentos óticos, como lupas, binóculos, óculos ou outras lentes óticas para observar a fonte de radiação ou alterar o raio laser.

■ 4 │ PT PLBS 2 A1
■ Não são permitidas manipulações (alterações) do dispositivo de laser.
■ Este manual de instruções deve ser guardado e entregue, em caso de transferência do disposi-tivo de laser.
■ Mantenha o aparelho fora do alcance de crianças.
■ Não autorize a utilização do aparelho por pessoas que não estejam familiarizadas com o mesmo ou que não tenham compreendido es-tas instruções. O aparelho não é um brinquedo e é perigoso, caso seja utilizado por pessoas inexperientes.
■ Evite uma postura corporal incorreta. Assegure uma posição estável e mantenha sempre o equilíbrio. Desta forma, consegue controlar melhor o aparelho em situações inesperadas.
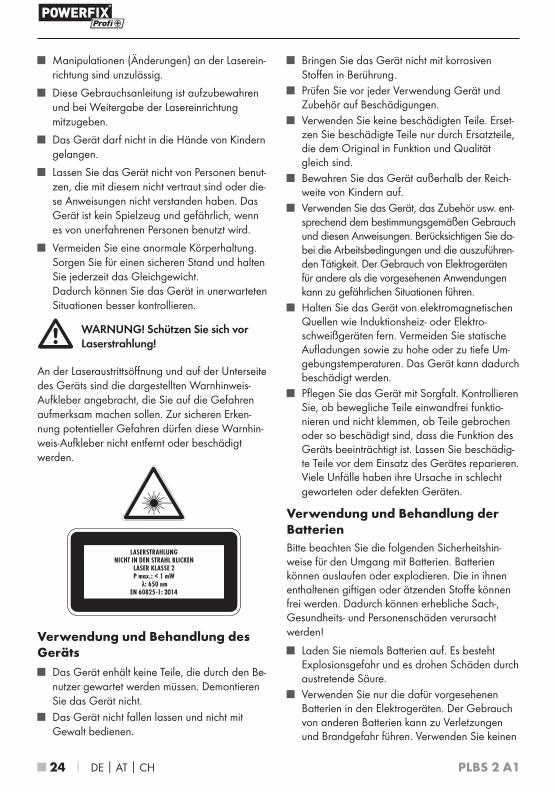
AVISO! Proteja-se contra radiação laser!
No orifício de saída do raio laser e na parte infe-rior do aparelho encontram-se os autocolantes de advertência de aviso apresentados, que chamam a sua atenção para os perigos. Para assegurar a identificação segura de potenciais perigos, estes autocolantes de advertência não podem ser remo-vidos ou danificados.
Utilização e manuseamento do aparelho
■ O aparelho não contém nenhumas peças que necessitem de manutenção por parte do utiliza-dor. Não desmonte o aparelho.
■ Não deixar cair o aparelho e não operar o aparelho com força.
■ Não coloque o aparelho em contacto com substâncias corrosivas.
■ Antes de cada utilização, verifique a existência de eventuais danos no aparelho e nos acessó-rios.
■ Não utilize peças danificadas. Substitua as peças danificadas apenas por peças sobresse-lentes idênticas, em termos de funcionamento e de qualidade, às peças originais.
■ Guarde o aparelho fora do alcance das crian-ças.
■ Utilize o aparelho, os acessórios, etc., de forma correta e de acordo com estas instruções. Te-nha em consideração as condições de trabalho e a atividade a exercer. A utilização de apare-lhos elétricos para utilizações diferentes das previstas pode levar a situações perigosas.
■ Mantenha o aparelho afastado de fontes eletromagnéticas, como aparelhos elétricos de soldadura ou de aquecimento por indução. Evite cargas estáticas, bem como temperaturas ambiente demasiado altas ou demasiado baixas. O aparelho pode ser danificado.
■ Faça a manutenção cuidadosa do aparelho. Verifique se as peças móveis funcionam correta-mente e não se encontram encravadas, se peças estão partidas ou danificadas a ponto de inter-ferir no bom funcionamento do aparelho. Antes de utilizar o aparelho, as peças danificadas devem ser reparadas. Muitos acidentes ocor-rem devido a má manutenção ou aparelhos avariados.
Utilização e manuseamento das pilhasRespeite as seguintes instruções de segurança relativas ao manuseamento das pilhas. As pilhas podem derramar ácido ou explodir. As substâncias nocivas ou corrosivas contidas nas pilhas podem ser libertadas, levando à ocorrência de danos materiais, pessoais e para a saúde!
■ Nunca carregue as pilhas. Existe perigo de explosão e risco de danos devido ao ácido extravasado.
PT │ 5 ■PLBS 2 A1
■ Utilize apenas as pilhas previstas para o apare-lho elétrico em questão. A utilização de outras pilhas pode causar ferimentos e perigo de in-cêndio. Não utilize nenhum outro tipo de pilhas e, em caso algum, uma outra fonte de tensão.
■ Mantenha as pilhas afastadas de clipes, moe-das, chaves, pregos, parafusos, ferramentas ou outros objetos de metal que possam causar um curto-circuito nos contactos. Um curto-circuito entre os contactos da pilha pode levar à ocor-rência de queimaduras e/ou incêndio.
■ Não utilize pilhas que tenham vertido ácido ou que estejam descoloridas, deformadas ou, de qualquer outra forma, danificadas.
■ Pilhas com fugas ou danificadas têm de ser eliminadas de forma adequada, tendo em atenção as precauções habituais (luvas de proteção).
■ Não abra, desmantele, fure, altere ou deite fora as pilhas, nem as exponha a choques desnecessários.
■ Não exponha as pilhas ao fogo ou a tempe-raturas superiores a 50 ºC. Não armazene as pilhas em locais quentes e não as exponha à radiação solar direta.
■ Não mergulhe as pilhas em água ou noutros líquidos.
■ Nunca coloque as pilhas num micro-ondas ou num recipiente de alta ou de baixa pressão.
■ Se a pilha for utilizada de forma incorreta, é possível que verta líquido. Evite o contacto com este líquido. Em caso de contacto acidental, lave com água. Se o líquido entrar em contacto com os olhos, procure adicionalmente assistên-cia médica. O líquido vertido da pilha pode provocar irritações ou queimaduras na pele.
■ A utilização incorreta pode levar à saída de vapores nocivos para a saúde e que podem irritar as vias respiratórias. Inspire ar fresco e, em caso de queixas, consulte um médico.
■ Perigo de curto-circuito ou de explosão em caso de manuseamento incorreto!
■ Elimine pilhas usadas e aparelhos avariados de acordo com as disposições legais.
Instruções de segurança específicas do aparelho
■ Mantenha o aparelho afastado de humidade. A infiltração de água pode causar um choque elétrico.
■ Não trabalhe com o aparelho em água ou noutros líquidos.
■ Segure bem o aparelho e não o deixe cair.
■ Evite uma ativação inadvertida. Certifique-se de que o aparelho está desligado quando coloca uma pilha. A colocação de pilha(s) no apare-lho ligado pode levar a acidentes.
■ Não feche as aberturas no aparelho.

■ 6 │ PT PLBS 2 A1
Antes da colocação em funcio-namentoInserir/substituir pilhas
Bomba de vácuo
♦ Para inserir as pilhas, abra o compartimento das pilhas , rodando a cobertura no sentido contrário ao dos ponteiros do relógio e remova-a.
♦ Introduza as pilhas fornecidas ou duas pilhas idênticas do tipo AA. Observe a polaridade correta das pilhas, a fim de evitar a ocorrência de danos!
♦ Volte a colocar a cobertura e feche-a, rodando no sentido dos ponteiros do relógio, até que encaixe de forma audível e fique bem fixa.
Laser de linhas
♦ Para inserir as pilhas, se necessário remova o aparelho da tampa de proteção .
♦ Abra a cobertura do compartimento das pi-lhas na parte inferior do laser de linhas e remova-a.
♦ Introduza as pilhas tipo botão fornecidas ou três pilhas idênticas do tipo LR44. Observe a polaridade correta das pilhas, a fim de evitar a ocorrência de danos.
♦ Volte a colocar a cobertura do compartimento das pilhas e feche-a até que encaixe de forma audível e fique bem fixa.
Utilizar a tampa de proteção/o suporte de paredeA tampa de proteção deve proteger especial-mente as vedações macias contra danos, caso o aparelho não seja utilizado.
♦ Após a utilização, insira sempre o aparelho na tampa de proteção .
♦ Também pode fixar a tampa de proteção na parede, com um parafuso, num dos pontos de fixação previstos e utilizar como suporte de parede.
Preparação do aparelho ■ Após a introdução das pilhas, o aparelho está
operacional.
■ Remova o aparelho da tampa de proteção/do suporte de parede .
■ Agarre o aparelho pelo menos com uma mão. O aparelho é adequado para destros e canhotos.
Colocação em funcionamento ATENÇÃO!
► Utilize o aparelho apenas para a utilização correta!
► Antes da utilização, verifique a existência de eventuais danos no aparelho! Não utilize o aparelho, caso a segurança operacional não seja garantida.
Ativação e desativação do laser de linhas
♦ Para ligar e desligar o laser de linhas , prima o interruptor LIGAR/DESLIGAR .
■ Para permitir uma melhor leitura, os níveis de bolha estão iluminados.
♦ Desligue novamente o laser após a utilização, premindo ointerruptor LIGAR/DESLIGAR .
Alinhamento do laser de linhas ♦ Alinhe o aparelho por meio dos níveis de bolha
horizontal ou vertical , alterando a inclina-ção do aparelho. Coloque a bolha de ar de um nível no centro, entre as linhas de marca-ção.
♦ Para o alinhamento oblíquo do raio laser, marque previamente dois pontos na posição desejada e alinhe o raio laser com estas marcações.
♦ Ligue a bomba de vácuo (ver capítulo Aspira-ção do aparelho).
PT │ 7 ■PLBS 2 A1
♦ Para utilizar o laser de linhas sem a função de aspiração, pode soltá-lo do suporte, puxan-do-o longitudinalmente.
♦ Coloque depois o laser de linhas novamente na guia e desloque-o no sentido do comparti-mento das pilhas , até que encaixe de forma audível.
Utilização do coletor de pó de perfuração
♦ Marque a posição desejada do furo na parede.
♦ Insira a broca apertada através do orifício da placa de proteção , até que saia novamente pela vedação .
♦ Assente a ponta da broca na marcação.
♦ Posicione a broca perpendicularmente à parede.
♦ Pressione o coletor de pó de perfuração na parede, de modo que as vedações fiquem encostadas à parede.
NOTA
► Para garantir que o coletor de pó de perfura-ção consegue recolher corretamente o pó, este deve estar sempre posicionado na vertical.
♦ Ligue a bomba de vácuo (ver capítulo Aspira-ção do aparelho).
♦ Agarre bem o berbequim com as duas mãos e siga as instruções de operação e de segurança do fabricante.
♦ Utilize apenas uma broca adequada com um diâmetro máximo de 10 mm.
♦ Use o seu equipamento de proteção individual (óculos de proteção).
♦ Extraia a broca do coletor de pó de perfuração antes de desligar a bomba de vácuo.
Esvaziamento do coletor de pó de perfuração
♦ Mantenha o coletor de pó de perfuração voltado para baixo. Pressione os botões de des-bloqueio nos dois lados com os polegares e os indicadores e levante a cobertura do coletor de pó de perfuração .
♦ Esvazie o coletor de pó de perfuração .
♦ Coloque a patilha exterior da cobertura novamente na nervura de centragem da cobertura.
♦ Baixe novamente a cobertura, até que os botões de desbloqueio encaixem de forma audível em ambos os lados.
♦ Certifique-se de que a cobertura fica bem fixa no coletor de pó de perfuração. Apenas deste modo é possível prevenir a saída indesejada de pó de perfuração.
Aspiração do aparelho ♦ Após ter alinhado o laser ou colocado o coletor
de pó de perfuração/a broca, ligue a bomba de vácuo no interruptor .
♦ Pressione brevemente o aparelho contra a parede. Após um breve período de tempo, o aparelho deve ter aderido à parede.
♦ Certifique-se de que o aparelho com a veda-ção fica completamente encostado à parede.
♦ Verifique a aderência automática do aparelho, tentando deslocá-lo ou soltá-lo através de uma ligeira pressão.
♦ Deixe a bomba de vácuo ligada durante todo o trabalho com o laser de linhas e/ou o coletor de pó de perfuração. Caso contrário, o apare-lho não consegue manter o vácuo necessário e solta-se da parede.
♦ Não utilize o aparelho para trabalhos acima do nível da cabeça.
♦ Se o aparelho não aderir automaticamente à parede, talvez a estrutura da superfície seja demasiado grossa. Não se consegue formar um vácuo suficiente. Neste caso, o aparelho tem de ser segurado por uma segunda pessoa.
■ 8 │ PT PLBS 2 A1
♦ Tenha atenção para que a vedação não seja destruída ou cortada por superfícies, arestas ou cantos afiados ou ásperos.
Remoção do aparelho ♦ Termine primeiro os trabalhos com o laser de
linhas e/ou a broca, e extraia a broca do aparelho.
♦ Segure bem o aparelho, para que não possa cair.
♦ Desligue a bomba de vácuo no interruptor e prima o botão de ventilação .
♦ Remova o aparelho da superfície.
♦ Utilize a tampa de proteção para proteger o aparelho e as vedações .
Resolução de falhas – O laser não funciona.
As pilhas estão descarregadas > substituir as pilhas.
– O aparelho não adere à superfície. As pilhas estão muito fracas ou descarregadas > substituir as pilhas. A vedação está danificada > segurar o aparelho com a mão. A estrutura da parede é demasiado grossa > segurar o aparelho com a mão.
Manutenção e limpeza AVISO! PERIGO DE FERIMENTOS!
Antes de realizar quaisquer traba-lhos no aparelho, desligue-o e retire as pilhas.
■ O aparelho trabalha sem ser necessário realizar uma manutenção
■ Para efeitos de reparação, o aparelho apenas pode ser aberto por um técnico especializado.
■ Tenha em atenção as instruções de segurança relativas às pilhas.
■ Mantenha o aparelho limpo para trabalhar bem e de forma segura.
■ Remover as impurezas no corpo do aparelho com um pano macio.
■ Utilize apenas água e detergente da loiça, para evitar danos.
■ Certifique-se de que, durante a limpeza, não entra humidade no aparelho.
■ Use luvas de proteção para limpar o aparelho. ■ Se, apesar dos processos de produção e de
verificação cuidadosos, o aparelho falhar, contacte o Serviço de Assistência Técnica.
ArmazenamentoCaso não utilize o aparelho durante um longo período de tempo, retire as pilhas e guarde-o num local limpo e seco, sem incidência solar direta.
Eliminação A embalagem é composta por materiais
recicláveis que pode depositar nos eco-pontos locais.
Não coloque ferramentas elétricas no lixo doméstico!
Em conformidade com a Diretiva Europeia 2012/19/EU, as ferramentas elétricas usadas têm de ser recolhidas separadamente e submetidas a reciclagem adequada.
PT │ 9 ■PLBS 2 A1
Não coloque pilhas no lixo doméstico!
Pilhas com defeito ou usadas têm de ser recicladas de acordo com a Diretiva
2006/66/EC. Devolva as pilhas e /ou o aparelho nos pontos de recolha disponibilizados.Relativamente às possibilidades de eliminação de ferramentas elétricas em fim de vida, informe-se junto da junta de freguesia ou câmara municipal da sua área de residência.
Garantia da Kompernass Handels GmbHEstimada Cliente, Estimado Cliente,
Este aparelho tem uma garantia de 3 anos a contar da data de compra. No caso deste produto ter defeitos, tem direitos legais contra o vendedor do produto. Estes direitos legais não são limitados pela nossa garantia que passamos a transcrever.
Condições de garantiaO prazo de garantia tem início na data da compra. Por favor, guarde bem o talão de compra original. Este documento é necessário como com-provativo da compra.
Se dentro de três anos a partir da data de compra deste produto, ocorrer um defeito de material ou fabrico, o produto será reparado ou substituído por nós – consoante a nossa preferência – gratuita-mente. Esta garantia parte do princípio que o apare-lho defeituoso e o comprovativo da compra (talão de compra) são apresentados dentro do prazo de três anos e é descrito brevemente, por escrito, em que consiste o defeito e quando ocorreu.
Se o defeito estiver coberto pela nossa garantia, receberá o produto reparado ou um novo produto.
Prazo de garantia e direitos legaisO período de garantia não é prolongado pelo acionamento da mesma. Isto também se aplica a peças substituídas e reparadas. Danos e defeitos que possam eventualmente já existir no momento da compra devem ser imediatamente comunicados, após retirar o aparelho da embalagem. Expirado o período da garantia, quaisquer reparações necessárias estão sujeitas a pagamento.
Âmbito da garantiaO aparelho foi fabricado segundo diretivas de qualidade rigorosas, com o maior cuidado, e testa-do escrupulosamente antes da sua distribuição.
A garantia abrange apenas defeitos de material ou de fabrico. Esta garantia não abrange peças do produto, que estão sujeitas ao desgaste normal e podem ser consideradas desta forma peças de desgaste, ou danos em peças frágeis, p. ex. interruptores, acumuladores, formas para bolos ou peças de vidro.
Esta garantia perde a validade, se o produto for danificado, utilizado incorretamente ou se a manutenção tenha sido realizada indevidamente. Para garantir uma utilização correta do produto, é necessário cumprir todas as instruções contidas no manual de instruções. Ações ou fins de utilização que são desaconselhados, ou para os quais é alertado no manual de instruções, têm de ser impreterivelmente evitados.
O produto foi concebido apenas para uso privado e não para uso comercial. A garantia extingue-se em caso de utilização incor-reta, uso de força e intervenções que não tenham sido efetuadas pela nossa Filial de Assistência Técnica autorizada.
■ 10 │ PT PLBS 2 A1
Procedimento em caso de acionamento da garantiaPara garantir um processamento rápido do seu pedido, siga, por favor, as seguintes instruções:
▯ Para todos os pedidos de esclarecimento, tenha à mão o talão de compra e o número do artigo (p. ex. IAN 12345) como comprovativo da compra.
▯ O número do artigo consta na placa de ca-racterísticas, numa impressão, na capa do seu manual de instruções (em baixo à esquerda) ou, como autocolante, no verso ou no lado inferior.
▯ Caso ocorram falhas de funcionamento ou outros defeitos, contacte primeiro o Serviço de Assistência Técnico, indicado em seguida, telefonicamente ou por e-mail.
▯ De seguida, pode enviar gratuitamente o produto registado como defeituoso, incluindo o comprovativo da compra (talão de compra) e indique o defeito e quando este ocorreu, para a morada do Serviço de Assistência Técnica que lhe foi indicada.
Em www.lidl-service.com poderá descarregar este manual de instruções e muitos outros, bem como vídeos sobre os produtos e software.
Assistência Técnica Assistência Portugal Tel.: 70778 0005 (0,12 EUR/Min.) E-Mail: [email protected]
IAN 277698
ImportadorPor favor, observe que a seguinte morada não é a morada do Serviço de Assistência Técnica. Primeiro entre em contacto com o Serviço de Assistência Técnica.
KOMPERNASS HANDELS GMBH
BURGSTRASSE 21
44867 BOCHUM
GERMANY
www.kompernass.com

GB│MT │ 11 ■PLBS 2 A1
ContentsIntroduction . . . . . . . . . . . . . . . . . . . . . . . . . . . . . . . . . . . . . . . . . . . . . . . . . . . . . 12Intended use . . . . . . . . . . . . . . . . . . . . . . . . . . . . . . . . . . . . . . . . . . . . . . . . . . . . . . . . . . . . . . . 12Features . . . . . . . . . . . . . . . . . . . . . . . . . . . . . . . . . . . . . . . . . . . . . . . . . . . . . . . . . . . . . . . . . . 12Package contents . . . . . . . . . . . . . . . . . . . . . . . . . . . . . . . . . . . . . . . . . . . . . . . . . . . . . . . . . . . 12Technical details . . . . . . . . . . . . . . . . . . . . . . . . . . . . . . . . . . . . . . . . . . . . . . . . . . . . . . . . . . . . 12
Safety information . . . . . . . . . . . . . . . . . . . . . . . . . . . . . . . . . . . . . . . . . . . . . . . 13Safety in the workplace . . . . . . . . . . . . . . . . . . . . . . . . . . . . . . . . . . . . . . . . . . . . . . . . . . . . . . 13Electrical safety . . . . . . . . . . . . . . . . . . . . . . . . . . . . . . . . . . . . . . . . . . . . . . . . . . . . . . . . . . . . 13Personal safety and rules for working with lasers . . . . . . . . . . . . . . . . . . . . . . . . . . . . . . . . . . . 13Appliance use and handling . . . . . . . . . . . . . . . . . . . . . . . . . . . . . . . . . . . . . . . . . . . . . . . . . . 14Battery use and care . . . . . . . . . . . . . . . . . . . . . . . . . . . . . . . . . . . . . . . . . . . . . . . . . . . . . . . . 14Appliance-specific safety instructions . . . . . . . . . . . . . . . . . . . . . . . . . . . . . . . . . . . . . . . . . . . . 15
Before use . . . . . . . . . . . . . . . . . . . . . . . . . . . . . . . . . . . . . . . . . . . . . . . . . . . . . . 15Inserting/replacing the batteries . . . . . . . . . . . . . . . . . . . . . . . . . . . . . . . . . . . . . . . . . . . . . . . 15Using the protective cover/wall bracket . . . . . . . . . . . . . . . . . . . . . . . . . . . . . . . . . . . . . . . . . . 15Getting started . . . . . . . . . . . . . . . . . . . . . . . . . . . . . . . . . . . . . . . . . . . . . . . . . . . . . . . . . . . . . 16Operation . . . . . . . . . . . . . . . . . . . . . . . . . . . . . . . . . . . . . . . . . . . . . . . . . . . . . . 16Switching the line laser on and off . . . . . . . . . . . . . . . . . . . . . . . . . . . . . . . . . . . . . . . . . . . . . . 16Aligning the line laser . . . . . . . . . . . . . . . . . . . . . . . . . . . . . . . . . . . . . . . . . . . . . . . . . . . . . . . . 16Using the drill dust collector . . . . . . . . . . . . . . . . . . . . . . . . . . . . . . . . . . . . . . . . . . . . . . . . . . . 16Emptying the drill dust collector . . . . . . . . . . . . . . . . . . . . . . . . . . . . . . . . . . . . . . . . . . . . . . . . 16Appliance suction function . . . . . . . . . . . . . . . . . . . . . . . . . . . . . . . . . . . . . . . . . . . . . . . . . . . . 17Detaching the appliance . . . . . . . . . . . . . . . . . . . . . . . . . . . . . . . . . . . . . . . . . . . . . . . . . . . . . 17
Troubleshooting . . . . . . . . . . . . . . . . . . . . . . . . . . . . . . . . . . . . . . . . . . . . . . . . . 17
Maintenance and cleaning . . . . . . . . . . . . . . . . . . . . . . . . . . . . . . . . . . . . . . . . . 18
Storage . . . . . . . . . . . . . . . . . . . . . . . . . . . . . . . . . . . . . . . . . . . . . . . . . . . . . . . . 18
Disposal . . . . . . . . . . . . . . . . . . . . . . . . . . . . . . . . . . . . . . . . . . . . . . . . . . . . . . . . 18
Kompernass Handels GmbH warranty . . . . . . . . . . . . . . . . . . . . . . . . . . . . . . 18Service . . . . . . . . . . . . . . . . . . . . . . . . . . . . . . . . . . . . . . . . . . . . . . . . . . . . . . . . . . . . . . . . . . . 19Importer . . . . . . . . . . . . . . . . . . . . . . . . . . . . . . . . . . . . . . . . . . . . . . . . . . . . . . . . . . . . . . . . . . 20
■ 12 │ GB│MT PLBS 2 A1
LINE LASER PLBS 2 A1
Introduction Congratulations on the purchase of your
new appliance. You have selected a high- quality product. The operating instructions
are part of this product. They contain important information about safety, usage and disposal. Before using the product, please familiarise yourself with all operating and safety instructions. Use the product only as described and for the range of applications specified. Please also pass these oper-ating instructions on to any future owner.
Intended useThis line laser with a drill dust collector is a battery-operated appliance that uses vacuum technology to create a suction mounting on standard interior wall surfaces. The appliance can be used to project a laser line onto a wall and collect the drill dust created when drilling a hole of up to 10 mm in diameter. Do not use the appliance for overhead work. Any other usage of or modification to the appliance is deemed to be improper and carries a significant risk of accidents. The manufacturer ac-cepts no responsibility for damage(s) attributable to misuse. The appliance is not intended for com-mercial use.
Features Line laser Horizontal level Vertical level ON/OFF switch for line laser Vacuum button Battery compartment vacuum pump Drill dust collector/cover for drill dust collector Protective plate/drill opening Battery compartment for line laser Vacuum pump seal Release (drill dust collector) ON/OFF switch for vacuum pump Seal (drill dust collector) Protective cover/wall bracket Tab/centring rib
Package contents1 line laser PLBS 2 A12 x 1.5 V AA batteries3 x 1.5 V LR44 batteries1 set of operating instructions
Technical details
Line laser:
Laser wavelength: 650 nm
Laser output: < 1 mW
Laser class: 2Batteries: 3 x 1.5 V , type LR44
(direct current)
Levels (horizontal and vertical)
Accuracy: 0.3°
Drill dust collector:
Max. drill diameter: 10 mm
Vacuum pump:
Battery: 2 x 1.5 V , type AA (direct current)

GB│MT │ 13 ■PLBS 2 A1
Safety information WARNING!
► Read all safety warnings and all instructions. Failure to follow the warnings and instructions may result in electric shock, fire and/or serious injury.
WARNING!
■ Do not allow children to play with packaging materials. There is a risk of suffocation.
NOTE
► Check the package for completeness and signs of visible damage.
► If the delivery is incomplete or damage has occurred as a result of defective packaging or during transport, contact the Service hotline (see section Service).
Save all warnings and instructions for future reference.
Do not remove any identification marks or labels from the appliance.
Safety in the workplace ■ Do not work with the appliance in areas where
there is a risk of explosions, or in the presence of flammable liquids, gases or dusts.
■ Keep children and bystanders away while oper-ating the appliance. Distractions can cause you to lose control.
■ Observe all safety instructions, guidelines, work safety and accident prevention regulations relevant to your activity and workplace.
Electrical safety ■ Do not use this appliance in wet or moist environ-
ments.
■ Remove the batteries if you do not intend to use the appliance for a long time.
Personal safety and rules for working with lasers
■ Stay alert, watch what you are doing and use common sense when operating the appliance. Do not use the appliance while you are tired or under the influence of drugs, alcohol or medica-tion. A moment of inattention while operating the appliance may result in serious personal injury.
■ Caution! If operating and adjustment equipment or procedures other than those specified here are used, this may result in hazardous radiation exposure.
■ A laser is an extremely intensive beam of light. Improper use can lead to severe and permanent injuries to the eyes and the retinas.
■ Do not aim the laser at people or animals!
■ Do not aim the laser at reflective surfaces. These can deflect the laser beam and put people at risk.
■ Do not work with the appliance at eye level.
■ Never look into the direct or reflected beam.
■ If the beam hits your eye, close your eyes im-mediately and turn your head away from the beam.
■ Do not use any optical instruments such as magnifying glasses, binoculars, spectacles or other optical lenses to observe the source of the beam or to deflect the laser.
■ Manipulations (modifications) to the direction of the laser are not permitted.
■ Store these operating instructions safely and pass them on to any future owner of the laser appliance.
■ Keep out of reach of children.

■ 14 │ GB│MT PLBS 2 A1
■ Do not allow persons unfamiliar with the appli-ance or these instructions to operate the appli-ance. This appliance is not a toy and can be dangerous in hands of inexperienced users.
■ Avoid any abnormal posture. Keep proper footing and balance at all times. This enables better control of the appliance in unexpected situations.
WARNING! Protect yourself from laser radiation!
There are warning labels by the laser discharge opening and on the underside of the appliance which draw attention to the dangers. To ensure proper recognition of the potential dangers, these warning labels may not be removed or defaced.
Appliance use and handling ■ No parts of this appliance need to be serviced
by the user. Do not dismantle the appliance.
■ Do not drop the appliance and do not use force.
■ Do not expose the appliance to corrosive sub-stances.
■ Check the appliance and accessories for dam-age before each use.
■ Do not use any damaged parts. Replace dam-aged parts only with replacement parts that are equal to the original in function and quality.
■ Keep the appliance out of the reach of children.
■ Use the appliance, the accessories, etc. in accordance with proper use and these instruc-tions. Take into account the operating conditions and the task to be performed. The use of electri-cal appliances for purposes other than those intended can result in hazardous situations.
■ Keep the appliance away from electromagnetic sources such as induction cookers or electric welding machines. Avoid static charges and also excessively high or low ambient tempera-tures. They can damage the appliance.
■ Treat the appliance with care. Check for mis-alignment or binding of moving parts, breakage of parts and any other damage that may impair the appliance's operation. If damaged, have the power tool repaired before use. Many ac-cidents are caused by poorly maintained or defective appliances.
Battery use and carePlease note the following safety instructions when handling the batteries. Batteries can leak or ex-plode. The poisonous or caustic substances they contain may leak out. This can cause significant property damage, personal injury or damage to health.
■ Never try to charge non-rechargeable batteries. There is a risk of explosion and damage due to leaking acids.
■ Use only the supplied batteries with the electrical appliances. The use of other battery units may lead to a risk of injury or fire. Do not use any other types of batteries and do not use any other power sources.
■ When they are not being used, store batteries away from paper clips, coins, keys, nails, screws or other small metal objects that could cause the contacts to be bridged. Short-circuiting the contacts of a battery may result in burns and/or fire.
■ Do not use batteries that are leaking, discol-oured, deformed or damaged in any other way.
■ Leaking or damaged batteries must be properly disposed of in compliance with the usual pre-cautions (protective gloves).
GB│MT │ 15 ■PLBS 2 A1
■ Do not open, dismantle, pierce, modify or throw batteries and avoid unnecessary impacts.
■ Do not expose batteries to naked flames or temperatures of above 50°C. Do not store bat-teries in hot locations and do not expose them to direct sunlight.
■ Never immerse batteries in water or other liq-uids.
■ Never place batteries in a microwave or high- or low-pressure container.
■ Improper use may cause fluid to leak out of the battery. If this happens, avoid contact with the fluid. If contact occurs, flush the affected area with water. Seek additional medical help if any of the fluid gets into your eyes. Leaking battery fluid can cause skin irritations or burns.
■ Incorrect use can cause vapours to escape that can cause damage to health and respiratory irritation. Ventilate the area immediately with fresh air and obtain medical advice.
■ Incorrect handling can lead to a short-circuit or an explosion!
■ Dispose of used batteries and defective appli-ances in compliance with legal requirements.
Appliance-specific safety instructions ■ Keep the appliance away from wet or dampness.
Water getting into the appliance may lead to an electric shock.
■ Do not work with this appliance in water or other liquids.
■ Keep firm hold of the appliance and do not drop it.
■ Avoid unintended switching on. Check that the appliance is switched off when you insert a bat-tery. Inserting batteries into the appliance while it is switched on can cause accidents.
■ Do not block off the openings on the appliance.
Before useInserting/replacing the batteries
Vacuum pump
♦ To insert batteries, open the battery compart-ment by turning the cover anticlockwise and removing it.
♦ Insert the supplied batteries or two equivalent AA batteries. Observe correct polarity when inserting batteries to avoid damage!
♦ Replace the cover and close it by turning it in a clockwise direction until it clicks firmly into place.
Line laser
♦ To insert the batteries, first remove the appli-ance from the protective cover .
♦ Open the battery compartment cover on the underside of the line laser and remove it.
♦ Insert the supplied button cells or three equiva-lent type LR44 button cells. Observe correct polarity when inserting batteries to avoid dam-age.
♦ Replace the battery compartment cover and close it so that it clicks firmly into place.
Using the protective cover/wall bracketThe protective cover is intended primarily to protect the soft seals from damage when the appliance is not in use.
♦ After use, always replace the protective cover .
♦ You can attach the protective cover to a pre-determined attachment point on the wall with a screw and use it as a wall bracket.
■ 16 │ GB│MT PLBS 2 A1
Getting started ■ After inserting the batteries, the appliance is
ready for use.
■ Remove the protective cover/wall bracket from the appliance.
■ Fully grip the appliance with one or, ideally, both hands. The appliance is suitable for either hand.
Operation CAUTION!
► Use the appliance only for its intended use. ► Check the appliance for damage before use.
Do not use the appliance if its operational safety cannot be guaranteed.
Switching the line laser on and off ♦ To switch the line laser on and off, press the
ON/OFF switch .
■ To make the levels easier to read, these are illuminated.
♦ Switch the laser off again by pressing the ON/OFF switch .
Aligning the line laser ♦ Align the appliance using the horizontal and
vertical levels by changing the tilt angle of the appliance. Centre the air bubble in one of the levels between the two marking lines.
♦ For diagonal alignment of the laser, mark two points in the desired alignment and line up the laser with these markings.
♦ Switch on the vacuum pump (see section Appliance suction function).
♦ To use the line laser without the suction func-tion, you can release it from the mount by pulling it in a horizontal direction.
♦ Replace the line laser on the guide and push it in the direction of the battery compartment until it clicks audibly into place.
Using the drill dust collector ♦ Mark the spot on the wall where you want to
drill the holes.
♦ Push the loaded drill through the opening on the protective plate until it comes out of the other side of the seal .
♦ Put the tip of the drill bit onto the marking.
♦ Hold the drill vertically to the wall.
♦ Push the drill dust collector up against the wall so that the seals lie up against the wall.
NOTE
► To ensure that the drill dust collector collects the dusts optimally, it should always be aligned vertically.
♦ Switch on the vacuum pump (see section Appliance suction function).
♦ Hold the drill firmly in both hands and follow the manufacturer's operating and safety instructions.
♦ Use only suitable drills up to a max. 10 mm in diameter.
♦ Wear your personal protective equipment (safety goggles)!
♦ Pull the drill out of the drill dust collector before you switch off the vacuum pump.
Emptying the drill dust collector ♦ Point the drill dust collector downwards.
Press the release buttons together on both sides between your thumb and index finger and swing the cover of the drill dust collector upwards.
♦ Empty the drill dust collector .
GB│MT │ 17 ■PLBS 2 A1
♦ Place the outer tab of the cover back on the centring rib of the cover.
♦ Swing the cover back until the release buttons click audibly into place on both sides.
♦ Ensure that the cover is firmly in place on the drill dust collector. This is the only way to pre-vent dust escaping.
Appliance suction function ♦ After you have aligned the laser or put the drill
dust collector/drill against the wall, switch on the vacuum pump at the switch .
♦ Push the appliance briefly firmly against the wall. After a short time, the appliance will be firmly sucked against the wall.
♦ Ensure that the seal of the appliance is fully against the wall.
♦ Check that the appliance stays in place by trying gently to pull it off or slide it across the surface.
♦ Leave the vacuum pump switched on the whole time you are working with the line laser and/or the drill dust collector. Otherwise, the appliance will not be able to maintain a sufficient vacuum and the appliance could come off the wall.
♦ Do not use the appliance for overhead work.
♦ If the appliance does not remain on the wall, it may be because the surface structure of the wall is simply too rough, and the appliance is unable to generate a sufficient vacuum. In this case, you will need a second person to hold the appliance in place.
♦ Ensure that the seal is not damaged or cut by rough surfaces, edges or corners.
Detaching the appliance ♦ First, finish your work with the line laser and/
or the drill and then remove the drill from the appliance.
♦ Hold the appliance firmly in place to prevent it from falling down.
♦ Switch off the vacuum pump at the switch and press the vacuum button .
♦ Remove the appliance from the surface.
♦ Use the protective cover to protect the appli-ance and the seals .
Troubleshooting – The laser is not working
Battery is dead > replace battery.
– Appliance does not grip onto the surface Battery is dead or too weak > replace battery. Seal is damaged > Hold the appliance by hand. Wall structure is too rough > Hold the appli-ance by hand.
■ 18 │ GB│MT PLBS 2 A1
Maintenance and cleaning WARNING! RISK OF INJURY! Always
switch the appliance off and remove the battery before carrying out any work on the appliance.
■ The appliance is maintenance-free. ■ The appliance should only be opened for
repairs by a qualified technician. ■ Heed the safety instructions for batteries. ■ Keep the appliance clean to ensure fault-free
operation. ■ Remove any dirt from the housing with a soft
cloth. ■ Use only water with a little washing-up liquid,
to prevent any possible damage. ■ Do not allow any moisture to penetrate into the
appliance during cleaning. ■ Wear protective gloves when cleaning the
appliance. ■ If, despite careful manufacturing and examina-
tion procedures, the appliance does not func-tion, contact Customer Service.
StorageIf you decide not to use the appliance for a long period, remove the batteries and store them in a clean, dry place away from direct sunlight.
Disposal The packaging is made from environmen-
tally friendly material and can be dis-posed of at your local recycling plant.
Do not dispose of power tools in your normal household waste!
European Directive 2012/19/EU requires that worn-out power tools be collected separately and recycled in an environmentally compatible manner.
Do not dispose of batteries with the normal household waste!
Defective or worn-out batteries must be recycled according to Directive 2006/66/EC. Take the batteries and/or appliance to a nearby collection facility for disposal.Please consult your local authorities regarding suit-able disposal of worn-out power tools.
Kompernass Handels GmbH warrantyDear Customer,
This appliance has a 3-year warranty valid from the date of purchase. If this product has any faults, you, the buyer, have certain statutory rights. Your statutory rights are not restricted in any way by the warranty described below.
Warranty conditionsThe validity period of the warranty starts from the date of purchase. Please keep your original receipt in a safe place. This document will be required as proof of purchase.
If any material or production fault occurs within three years of the date of purchase of the product, we will either repair or replace the product for you at our discretion. This warranty service is depend-ent on you presenting the defective appliance and the proof of purchase (receipt) and a short written description of the fault and its time of occurrence.
If the defect is covered by the warranty, your product will either be repaired or replaced by us. The repair or replacement of a product does not signify the beginning of a new warranty period.
Warranty period and statutory claims for defectsThe warranty period is not prolonged by repairs effected under the warranty. This also applies to replaced and repaired components. Any damage and defects present at the time of purchase must be reported immediately after unpacking. Repairs carried out after expiry of the warranty period shall be subject to a fee.
GB│MT │ 19 ■PLBS 2 A1
Scope of the warrantyThis appliance has been manufactured in accord-ance with strict quality guidelines and inspected meticulously prior to delivery.
The warranty covers material faults or production faults. The warranty does not extend to product parts subject to normal wear and tear or fragile parts such as switches, batteries, baking moulds or parts made of glass.
The warranty does not apply if the product has been damaged, improperly used or improperly maintained. The directions in the operating instruc-tions for the product regarding proper use of the product are to be strictly followed. Uses and actions that are discouraged in the operating instructions or which are warned against must be avoided.
This product is intended solely for private use and not for commercial purposes. The warranty shall be deemed void in cases of misuse or improper handling, use of force and modifications/repairs which have not been carried out by one of our authorised Service centres.
Warranty claim procedureTo ensure quick processing of your case, please observe the following instructions:
▯ Please have the till receipt and the item number (e.g. IAN 12345) available as proof of purchase.
▯ You will find the item number on the type plate, an engraving on the front page of the instructions (bottom left), or as a sticker on the rear or bottom of the appliance.
▯ If functional or other defects occur, please contact the service department listed either by telephone or by e-mail.
▯ You can return a defective product to us free of charge to the service address that will be provided to you. Ensure that you enclose the proof of purchase (till receipt) and information about what the defect is and when it occurred.
You can download these instructions along with many other manuals, product videos and software on www.lidl-service.com.
Service
Service Great Britain Tel.: 0871 5000 720 (£ 0.10/Min.) E-Mail: [email protected]
Service Malta Tel.: 80062230 E-Mail: [email protected]
IAN 277698

■ 20 │ GB│MT PLBS 2 A1
ImporterPlease note that the following address is not the service address. Please use the service address provided in the operating instructions.
KOMPERNASS HANDELS GMBH
BURGSTRASSE 21
44867 BOCHUM
GERMANY
www.kompernass.com

DE│AT│CH │ 21 ■PLBS 2 A1
InhaltsverzeichnisEinleitung . . . . . . . . . . . . . . . . . . . . . . . . . . . . . . . . . . . . . . . . . . . . . . . . . . . . . . . 22Bestimmungsgemäßer Gebrauch . . . . . . . . . . . . . . . . . . . . . . . . . . . . . . . . . . . . . . . . . . . . . . . 22Ausstattung . . . . . . . . . . . . . . . . . . . . . . . . . . . . . . . . . . . . . . . . . . . . . . . . . . . . . . . . . . . . . . . . 22Lieferumfang . . . . . . . . . . . . . . . . . . . . . . . . . . . . . . . . . . . . . . . . . . . . . . . . . . . . . . . . . . . . . . . 22Technische Daten . . . . . . . . . . . . . . . . . . . . . . . . . . . . . . . . . . . . . . . . . . . . . . . . . . . . . . . . . . . 22
Sicherheitshinweise . . . . . . . . . . . . . . . . . . . . . . . . . . . . . . . . . . . . . . . . . . . . . . 23Sicherheit am Arbeitsplatz . . . . . . . . . . . . . . . . . . . . . . . . . . . . . . . . . . . . . . . . . . . . . . . . . . . . 23Elektrische Sicherheit . . . . . . . . . . . . . . . . . . . . . . . . . . . . . . . . . . . . . . . . . . . . . . . . . . . . . . . . 23Sicherheit von Personen und laserspezifische Verhaltensregeln . . . . . . . . . . . . . . . . . . . . . . . . 23Verwendung und Behandlung des Geräts . . . . . . . . . . . . . . . . . . . . . . . . . . . . . . . . . . . . . . . . 24Verwendung und Behandlung der Batterien . . . . . . . . . . . . . . . . . . . . . . . . . . . . . . . . . . . . . . 24Gerätespezifische Sicherheitshinweise . . . . . . . . . . . . . . . . . . . . . . . . . . . . . . . . . . . . . . . . . . . 25
Vor der Inbetriebnahme . . . . . . . . . . . . . . . . . . . . . . . . . . . . . . . . . . . . . . . . . . 26Batterien einsetzen / wechseln . . . . . . . . . . . . . . . . . . . . . . . . . . . . . . . . . . . . . . . . . . . . . . . . . 26Schutzkappe / Wandhalterung verwenden . . . . . . . . . . . . . . . . . . . . . . . . . . . . . . . . . . . . . . . 26Vorbereitung des Geräts . . . . . . . . . . . . . . . . . . . . . . . . . . . . . . . . . . . . . . . . . . . . . . . . . . . . . 26
Inbetriebnahme . . . . . . . . . . . . . . . . . . . . . . . . . . . . . . . . . . . . . . . . . . . . . . . . . 26Ein- und Ausschalten des Linienlasers . . . . . . . . . . . . . . . . . . . . . . . . . . . . . . . . . . . . . . . . . . . . 26Ausrichten des Linienlasers . . . . . . . . . . . . . . . . . . . . . . . . . . . . . . . . . . . . . . . . . . . . . . . . . . . . 26Verwenden des Bohrstaubfängers . . . . . . . . . . . . . . . . . . . . . . . . . . . . . . . . . . . . . . . . . . . . . . 27Entleeren des Bohrstaubfängers . . . . . . . . . . . . . . . . . . . . . . . . . . . . . . . . . . . . . . . . . . . . . . . . 27Ansaugen des Geräts . . . . . . . . . . . . . . . . . . . . . . . . . . . . . . . . . . . . . . . . . . . . . . . . . . . . . . . . 27Ablösen des Geräts . . . . . . . . . . . . . . . . . . . . . . . . . . . . . . . . . . . . . . . . . . . . . . . . . . . . . . . . . 28
Fehlerbehebung . . . . . . . . . . . . . . . . . . . . . . . . . . . . . . . . . . . . . . . . . . . . . . . . . 28
Wartung und Reinigung . . . . . . . . . . . . . . . . . . . . . . . . . . . . . . . . . . . . . . . . . . . 28
Lagerung . . . . . . . . . . . . . . . . . . . . . . . . . . . . . . . . . . . . . . . . . . . . . . . . . . . . . . . 28
Entsorgung . . . . . . . . . . . . . . . . . . . . . . . . . . . . . . . . . . . . . . . . . . . . . . . . . . . . . 28
Garantie der Kompernaß Handels GmbH . . . . . . . . . . . . . . . . . . . . . . . . . . . . 29
Service . . . . . . . . . . . . . . . . . . . . . . . . . . . . . . . . . . . . . . . . . . . . . . . . . . . . . . . . . 30
Importeur . . . . . . . . . . . . . . . . . . . . . . . . . . . . . . . . . . . . . . . . . . . . . . . . . . . . . . 30

■ 22 │ DE│AT│CH PLBS 2 A1
LINIENLASER PLBS 2 A1
Einleitung Wir beglückwünschen Sie zum Kauf Ihres
neuen Gerätes. Sie haben sich damit für ein hochwertiges Produkt entschieden. Die
Bedienungsanleitung ist Teil dieses Produkts. Sie enthält wichtige Hinweise für Sicherheit, Gebrauch und Entsorgung. Machen Sie sich vor der Benutzung des Produkts mit allen Bedien- und Sicherheitshinwei-sen vertraut. Benutzen Sie das Produkt nur wie beschrieben und für die angegebenen Einsatzberei-che. Händigen Sie alle Unterlagen bei Weitergabe des Produkts an Dritte mit aus.
Bestimmungsgemäßer GebrauchDer Linienlaser mit Bohrstaubfänger ist ein batterie-betriebenes Gerät, das sich durch Vakuumtechnik an eine gängige Wandinnenfläche ansaugen kann. Zur Projektion einer Laserlinie an eine Wand und zum Auffangen von Bohrstaub beim Bohren eines Loches bis max. 10 mm Durchmesser kann dieses Gerät verwendet werden. Verwenden Sie das Gerät nicht für Arbeiten über Kopf. Jede andere Verwendung oder Veränderung des Gerätes gilt als nicht bestimmungsgemäß und birgt erhebliche Unfallgefahren. Für aus bestim-mungswidriger Verwendung entstandene Schäden übernimmt der Hersteller keine Haftung. Das Gerät ist nicht für den gewerblichen Einsatz bestimmt.
Ausstattung Linienlaser Horizontale Libelle Vertikale Libelle EIN- / AUS-Schalter Linienlaser Entlüftungstaste Batteriefach Vakuumpumpe Bohrstaubfänger / Abdeckung Bohrstaubfänger Schutzplatte / Bohrer-Durchführung Batteriefach Linienlaser Dichtung Vakuumsauger Entriegelung Bohrstaubfänger EIN- / AUS-Schalter Vakuumpumpe Dichtung Bohrstaubfänger Schutzkappe / Wandhalterung Lasche / Zentrierrippe
Lieferumfang1 Linienlaser PLBS 2 A12 Batterie 1,5 V Typ AA3 Batterie 1,5 V Typ LR441 Bedienungsanleitung
Technische Daten
Linienlaser:
Laser Wellenlänge: 650 nm
Laser Leistung: < 1 mW
Laser Klasse: 2Batterie: 3 x 1,5 V , Typ LR44
(Gleichstrom)
Libellen (horizontal und vertikal):
Genauigkeit: 0,3°
Bohrstaubfänger:
Max. Bohrer-Durchmesser: 10 mm
Vakuumpumpe:
Batterie: 2 x 1,5 V , Typ AA (Gleichstrom)
DE│AT│CH │ 23 ■PLBS 2 A1
Sicherheitshinweise WARNUNG!
► Lesen Sie alle Sicherheitshinweise und Anwei-sungen. Versäumnisse bei der Einhaltung der Sicherheitshinweise und Anweisungen können elektrischen Schlag, Brand und/oder schwere Verletzungen verursachen.
WARNUNG!
■ Verpackungsmaterialien dürfen nicht zum Spielen verwendet werden. Es besteht Erstickungsgefahr.
HINWEIS
► Prüfen Sie die Lieferung auf Vollständigkeit und auf sichtbare Schäden.
► Bei einer unvollständigen Lieferung oder Schäden infolge mangelhafter Verpackung oder durch Transport wenden Sie sich an die Service-Hotline (siehe Kapitel Service).
Bewahren Sie alle Sicherheitshinweise und Anweisungen für die Zukunft auf.
Entfernen Sie keine Kennzeichnungen und Hinweise vom Gerät.
Sicherheit am Arbeitsplatz ■ Arbeiten Sie mit dem Gerät nicht in explosions-
gefährdeter Umgebung und nicht dort, wo sich brennbare Flüssigkeiten, Gase oder Stäube befinden.
■ Halten Sie Kinder und andere Personen während der Benutzung des Geräts fern. Bei Ablenkung können Sie die Kontrolle über das Gerät verlieren.
■ Dieses Gerät kann von Kindern ab 8 Jahren und darüber sowie von Personen mit verringer-ten physischen, sensorischen oder mentalen Fähigkeiten oder Mangel an Erfahrung und Wissen benutzt werden, wenn sie beaufsichtigt oder bezüglich des sicheren Gebrauchs des Gerätes unterwiesen wurden und die daraus resultierenden Gefahren verstehen. Kinder dürfen nicht mit dem Gerät spielen. Reinigung und Benutzer-Wartung dürfen nicht von Kindern ohne Beaufsichtigung durchgeführt werden.
■ Beachten Sie die für Ihre Tätigkeit und Arbeits-platz geltenden Sicherheitshinweise, Richtlinien, Arbeitsschutz- und Unfallverhütungsvorschriften und Schutzrichtlinien.
Elektrische Sicherheit ■ Arbeiten Sie mit diesem Gerät nicht in feuchter
oder nasser Umgebung.
■ Entfernen Sie die Batterie aus dem Gerät, wenn Sie es längere Zeit nicht benutzen.
Sicherheit von Personen und laser-spezifische Verhaltensregeln
■ Seien Sie aufmerksam, achten Sie darauf, was Sie tun und gehen Sie mit Vernunft an die Arbeit mit diesem Gerät. Benutzen Sie das Gerät nicht, wenn Sie müde sind oder unter Einfluss von Drogen, Alkohol oder Medikamenten stehen. Ein Moment der Unachtsamkeit beim Gebrauch des Gerätes kann zu ernsthaften Verletzungen führen.
■ Vorsicht! Wenn andere als die hier angege-benen Bedienungs- oder Justiereinrichtungen be-nutzt oder andere Verfahrensweisen ausgeführt werden, kann dies zu gefährlicher Strahlenein-wirkung führen.
■ Ein Laser ist eine äußerst intensive Lichtstrah-lung. Bei unsachgemäßer Benutzung können schwere und bleibende Verletzungen an Augen und Netzhaut die Folge sein.
■ Den Laserstrahl nicht auf Personen oder Tiere richten.
■ Den Laserstrahl nicht auf reflektierende Flächen richten; diese können den Laserstrahl umlenken und Menschen gefährden.
■ Arbeiten Sie mit dem Gerät nicht auf Augen-höhe.
■ Nicht in den direkten oder reflektierten Strahl blicken.
■ Falls Laserstrahlung ins Auge trifft, sind die Au-gen bewusst zu schließen und der Kopf sofort aus dem Strahl zu bewegen.
■ Keine optischen Instrumente wie Lupen, Ferngläser, Brillen oder andere optische Linsen zur Betrachtung der Strahlenquelle oder zur Veränderung des Laserstrahls benutzen.
■ 24 │ DE│AT│CH PLBS 2 A1
■ Manipulationen (Änderungen) an der Laserein-richtung sind unzulässig.
■ Diese Gebrauchsanleitung ist aufzubewahren und bei Weitergabe der Lasereinrichtung mitzugeben.
■ Das Gerät darf nicht in die Hände von Kindern gelangen.
■ Lassen Sie das Gerät nicht von Personen benut-zen, die mit diesem nicht vertraut sind oder die-se Anweisungen nicht verstanden haben. Das Gerät ist kein Spielzeug und gefährlich, wenn es von unerfahrenen Personen benutzt wird.
■ Vermeiden Sie eine anormale Körperhaltung. Sorgen Sie für einen sicheren Stand und halten Sie jederzeit das Gleichgewicht. Dadurch können Sie das Gerät in unerwarteten Situationen besser kontrollieren.
WARNUNG! Schützen Sie sich vor Laserstrahlung!
An der Laseraustrittsöffnung und auf der Unterseite des Geräts sind die dargestellten Warnhinweis-Aufkleber angebracht, die Sie auf die Gefahren aufmerksam machen sollen. Zur sicheren Erken-nung potentieller Gefahren dürfen diese Warnhin-weis-Aufkleber nicht entfernt oder beschädigt werden.
Verwendung und Behandlung des Geräts
■ Das Gerät enhält keine Teile, die durch den Be-nutzer gewartet werden müssen. Demontieren Sie das Gerät nicht.
■ Das Gerät nicht fallen lassen und nicht mit Gewalt bedienen.
■ Bringen Sie das Gerät nicht mit korrosiven Stoffen in Berührung.
■ Prüfen Sie vor jeder Verwendung Gerät und Zubehör auf Beschädigungen.
■ Verwenden Sie keine beschädigten Teile. Erset-zen Sie beschädigte Teile nur durch Ersatzteile, die dem Original in Funktion und Qualität gleich sind.
■ Bewahren Sie das Gerät außerhalb der Reich-weite von Kindern auf.
■ Verwenden Sie das Gerät, das Zubehör usw. ent-sprechend dem bestimmungsgemäßen Gebrauch und diesen Anweisungen. Berücksichtigen Sie da-bei die Arbeitsbedingungen und die auszuführen-den Tätigkeit. Der Gebrauch von Elektrogeräten für andere als die vorgesehenen Anwendungen kann zu gefährlichen Situationen führen.
■ Halten Sie das Gerät von elektromagnetischen Quellen wie Induktionsheiz- oder Elektro-schweißgeräten fern. Vermeiden Sie statische Aufladungen sowie zu hohe oder zu tiefe Um-gebungstemperaturen. Das Gerät kann dadurch beschädigt werden.
■ Pflegen Sie das Gerät mit Sorgfalt. Kontrollieren Sie, ob bewegliche Teile einwandfrei funktio-nieren und nicht klemmen, ob Teile gebrochen oder so beschädigt sind, dass die Funktion des Geräts beeinträchtigt ist. Lassen Sie beschädig-te Teile vor dem Einsatz des Gerätes reparieren. Viele Unfälle haben ihre Ursache in schlecht gewarteten oder defekten Geräten.
Verwendung und Behandlung der BatterienBitte beachten Sie die folgenden Sicherheitshin-weise für den Umgang mit Batterien. Batterien können auslaufen oder explodieren. Die in ihnen enthaltenen giftigen oder ätzenden Stoffe können frei werden. Dadurch können erhebliche Sach-, Gesundheits- und Personenschäden verursacht werden!
■ Laden Sie niemals Batterien auf. Es besteht Explosionsgefahr und es drohen Schäden durch austretende Säure.
■ Verwenden Sie nur die dafür vorgesehenen Batterien in den Elektrogeräten. Der Gebrauch von anderen Batterien kann zu Verletzungen und Brandgefahr führen. Verwenden Sie keinen
DE│AT│CH │ 25 ■PLBS 2 A1
anderen Batterie-Typ und benutzen Sie keines-falls eine andere Spannungsquelle.
■ Halten Sie die Batterie fern von Büroklammern, Münzen, Schlüsseln, Nägeln, Schrauben, Werk-zeugen oder anderen Metallgegenständen, die eine Überbrückung der Kontakte verursachen könnten. Ein Kurzschluss zwischen Batteriekon-takten kann Verbrennungen und / oder Feuer zur Folge haben.
■ Verwenden Sie keine Batterien die Ausgelaufen, verfärbt, deformiert oder in anderer Weise beschädigt sind.
■ Undichte oder beschädigte Batterien müssen unter Beachtung der üblichen Vorsichtsmaßnah-men (Schutzhandschuhe) fachgerecht entsorgt werden.
■ Öffnen, zerlegen, durchstechen, ändern und werfen Sie Batterien nicht und setzen Sie sie keinen unnötigen Stößen aus.
■ Setzen Sie Batterien nicht dem Feuer oder Temperaturen von über 50°C aus. Lagern Sie Batterien nicht an heißen Orten und setzen Sie diese nicht direkter Sonneneinstrahlung aus.
■ Tauchen Sie Batterien nicht in Wasser oder andere Flüssigkeiten.
■ Legen Sie Batterien nie in eine Mikrowelle oder in Hoch- oder Unterdruckbehälter.
■ Bei falscher Anwendung kann Flüssigkeit aus der Batterie austreten. Vermeiden Sie den Kon-takt damit. Bei zufälligem Kontakt mit Wasser abspülen. Wenn die Flüssigkeit in die Augen kommt, nehmen Sie zusätzlich ärztliche Hilfe in Anspruch. Austretende Batterieflüssigkeit kann zu Hautreizungen oder Verbrennungen führen.
■ Bei falscher Anwendung können Dämpfe austreten, die gesundheitsschädlich sind und die Atemwege reizen. Führen Sie Frischluft zu und suchen Sie bei Beschwerden einen Arzt auf.
■ Bei unsachgemäßer Handhabung besteht die Gefahr eines Kurzschlusses oder einer Explosion!
■ Entsorgen Sie verbrauchte Batterien und defekte Geräte den gesetzlichen Bestimmungen entspre-chend.
Gerätespezifische Sicherheitshinweise ■ Halten Sie das Gerät von Nässe und Feuchtig-
keit fern. Das Eindringen von Wasser kann zu einem elektrischen Schlag führen.
■ Arbeiten Sie mit diesem Gerät nicht in Wasser oder anderen Flüssigkeiten.
■ Halten Sie das Gerät gut fest und lassen Sie es nicht herunter fallen.
■ Vermeiden Sie ein versehentliches Einschalten. Vergewissern Sie sich, dass das Gerät ausge-schaltet ist, wenn Sie eine Batterie einsetzen. Das Einsetzen von Batterie(n) in das eingeschal-tete Gerät kann zu Unfällen führen.
■ Verschließen Sie die geräteseitigen Öffnungen nicht.

■ 26 │ DE│AT│CH PLBS 2 A1
Vor der InbetriebnahmeBatterien einsetzen / wechseln
Vakuumpumpe
♦ Um die Batterien einzulegen, öffnen Sie das Batteriefach durch Drehen der Abdeckung gegen den Uhrzeigersinn und nehmen Sie diese ab.
♦ Legen Sie die mitgelieferten Batterien oder zwei gleiche Batterien des Typs AA ein. Beachten Sie die korrekte Polarität der Batterien, um Schäden zu vermeiden!
♦ Setzen Sie die Abdeckung wieder auf und schließen Sie diese durch Drehung im Uhrzei-gersinn, bis sie hörbar einrastet und fest sitzt.
Linienlaser
♦ Um die Batterien einzulegen, nehmen Sie das Gerät ggf. aus der Schutzkappe .
♦ Öffnen Sie die Abdeckung des Batteriefachs auf der Unterseite des Linienlasers und nehmen Sie diese ab.
♦ Legen Sie die mitgelieferten Knopfzellen oder drei gleiche Batterien des Typs LR44 ein. Beach-ten Sie die korrekte Polarität der Batterien, um Schäden zu vermeiden.
♦ Setzen Sie die Abdeckung des Batteriefachs wieder auf und schließen Sie diese, bis sie
hörbar einrastet und fest sitzt.
Schutzkappe / Wandhalterung verwendenDie Schutzkappe soll insbesondere die weichen Dichtungen vor Beschädigungen schützen, wenn das Gerät nicht verwendet wird.
♦ Legen Sie das Gerät nach Benutzung immer wieder in die Schutzkappe zurück.
♦ Sie können die Schutzkappe auch an einem der vorgesehenen Befestigungspunkte mit einer Schraube an der Wand fixieren und als Wandhalterung verwenden.
Vorbereitung des Geräts ■ Nach dem Einsetzen der Batterien ist das Gerät
betriebsbereit.
■ Entnehmen Sie das Gerät der Schutzkappe / Wandhalterung .
■ Umfassen Sie das Gerät mit mindestens einer Hand. Das Gerät ist für Links- und Rechtshänder geeignet.
Inbetriebnahme ACHTUNG!
► Verwenden Sie das Gerät nur zum bestim-mungsgemäßen Gebrauch!
► Prüfen Sie das Gerät vor Verwendung auf mögliche Schäden! Benutzen Sie das Gerät nicht, wenn die Betriebssicherheit nicht gewährleistet ist.
Ein- und Ausschalten des Linienlasers ♦ Zum Ein- und Ausschalten des Linienlasers
drücken Sie den EIN- / AUS-Schalter .
■ Um die Libellen besser ablesen zu kön-nen, sind diese beleuchtet.
♦ Schalten Sie den Laser nach Verwendung wieder aus, durch drücken des EIN- / AUS-Schalters .
Ausrichten des Linienlasers ♦ Richten Sie das Gerät mittels der Libellen hori-
zontal oder vertikal aus, indem Sie die Neigung des Geräts verändern. Bringen Sie die Luftblase einer Libelle mittig zwischen die Markierungslinien.
♦ Für schräges Ausrichten des Laserstrahls markie-ren Sie zuvor zwei Stellen in der gewünschten Flucht und richten Sie den Laserstrahl an diesen Markierungen aus.
♦ Schalten Sie die Vakuumpumpe ein (siehe Kapitel Ansaugen des Geräts).
DE│AT│CH │ 27 ■PLBS 2 A1
♦ Um den Linienlaser ohne Ansaug-Funktion zu benutzen, können Sie diesen durch ziehen in Längsrichtung aus der Halterung lösen.
♦ Setzen Sie den Linienlaser anschließend wieder auf die Führung und schieben Sie ihn in Rich-tung Batteriefach , bis er hörbar einrastet.
Verwenden des Bohrstaubfängers ♦ Markieren Sie die gewünschte Bohrlochposition
an der Wand.
♦ Stecken Sie den eingespannten Bohrer durch die Öffnung der Schutzplatte , bis er durch die Dichtung wieder austritt.
♦ Setzen Sie die Bohrerspitze an die Markierung an.
♦ Stellen Sie den Bohrer senkrecht zur Wand auf.
♦ Drücken Sie den Bohrstaubfänger so an die Wand, dass die Dichtungen an der Wand anliegen.
HINWEIS
► Um zu gewährleisten, dass der Bohrstaubfän-ger den Staub optimal auffangen kann, sollte dieser immer vertikal ausgerichtet sein.
♦ Schalten Sie die Vakuumpumpe ein (siehe Kapitel Ansaugen des Geräts).
♦ Halten Sie die Bohrmaschine mit beiden Hän-den fest und beachten Sie die Bedienungs- und Sicherheitshinweise des Herstellers.
♦ Verwenden Sie nur geeignete Bohrer bis max. 10 mm Durchmesser.
♦ Tragen Sie Ihre persönliche Schutzausrüstung (Schutzbrille).
♦ Ziehen Sie den Bohrer aus dem Bohrstaubfänger , bevor Sie die Vakuumpumpe abschalten.
Entleeren des Bohrstaubfängers ♦ Halten Sie den Bohrstaubfänger nach unten.
Drücken Sie die Entriegelungstasten beidsei-tig mit Daumen und Zeigefinger zusammen und schwenken Sie die Abdeckung des Bohrstaub-fängers nach oben.
♦ Entleeren Sie den Bohrstaubfänger .
♦ Setzen Sie die äußere Lasche der Abdeckung wieder auf die Zentrierrippe der Abde-
ckung auf.
♦ Schwenken Sie die Abdeckung zurück, bis die Entriegelungstasten hörbar auf beiden Seiten einrasten.
♦ Vergewissern Sie sich, dass die Abdeckung fest auf dem Bohrstaubfänger sitzt. Nur so wird der ungewollte Austritt von Bohrstaub verhindert.
Ansaugen des Geräts ♦ Nachdem Sie den Laser ausgerichtet haben
bzw. den Bohrstaubfänger / Bohrer angesetzt haben, schalten Sie die Vakuumpumpe am Schalter ein.
♦ Drücken Sie das Gerät kurz fest an die Wand. Nach einem kurzen Moment sollte das Gerät sich an der Wand festgesaugt haben.
♦ Achten Sie darauf, dass das Gerät mit der Dich-tung vollständig auf der Oberfläche aufliegt.
♦ Prüfen Sie das selbstständige Halten des Gerä-tes, indem Sie versuchen, es mit leichtem Druck zu verschieben oder abzulösen.
♦ Lassen Sie die Vakuumpumpe während der gesamten Arbeit mit dem Linienlaser und / oder dem Bohrstaubfänger eingeschaltet. Das Gerät kann sonst das erforderliche Vakuum nicht auf-rechterhalten und löst sich von der Wand.
♦ Verwenden Sie das Gerät nicht für Arbeiten über Kopf.
♦ Wenn das Gerät nicht selbstständig an der Wand hält, ist die Struktur der Oberfläche möglicherweise zu grob. Es kann kein ausreichendes Vakuum gebildet werden. Lassen Sie in diesem Fall das Gerät durch eine zweite Person festhalten.
♦ Achten Sie darauf, dass die Dichtung nicht durch scharfe oder raue Oberflächen, Kanten oder Ecken zerstört oder zerschnitten wird.
■ 28 │ DE│AT│CH PLBS 2 A1
Ablösen des Geräts ♦ Beenden Sie zunächst die Arbeiten mit dem
Linienlaser und / oder das Bohren und ziehen Sie den Bohrer aus dem Gerät heraus.
♦ Halten Sie das Gerät fest, damit es nicht herun-terfallen kann.
♦ Schalten Sie die Vakuumpumpe am Schalter aus und drücken Sie die Entlüftungstaste .
♦ Nehmen Sie das Gerät von der Oberfläche ab.
♦ Verwenden Sie die Schutzkappe , um das Gerät und die Dichtungen zu schützen.
Fehlerbehebung – Der Laser hat keine Funktion.
Batterie ist leer > Batterie austauschen.
– Gerät haftet nicht an der Oberfläche. Batterie ist zu schwach oder leer > Batterie austauschen. Dichtung ist beschädigt > Gerät von Hand halten. Wandstruktur ist zu grob > Gerät von Hand halten.
Wartung und Reinigung WARNUNG! VERLETZUNGSGEFAHR!
Schalten Sie vor allen Arbeiten am Gerät das Gerät aus und entnehmen Sie die Batterien.
■ Das Gerät arbeitet wartungsfrei ■ Das Gerät darf zu Reparaturzwecken nur von
einer Fachkraft geöffnet werden. ■ Beachten Sie die Sicherheitshinweise für
Batterien. ■ Halten Sie das Gerät sauber, um gut und sicher
zu arbeiten. ■ Verschmutzungen am Gehäuse entfernen Sie
mit einem weichen Tuch. ■ Verwenden Sie nur Wasser mit Spülmittel, um
Schäden zu vermeiden. ■ Beim Reinigen darf keine Feuchtigkeit in das
Gerät dringen. ■ Tragen Sie zum Reinigen des Gerätes Schutz-
handschuhe. ■ Sollte das Gerät trotz sorgfältiger Herstellungs-
und Prüfverfahren einmal ausfallen, kontaktieren Sie den Kundendienst.
LagerungSollten Sie das Gerät längere Zeit nicht benutzen, entnehmen Sie die Batterien und lagern Sie es an einem sauberen, trockenen Ort ohne direkte Sonneneinstrahlung.
Entsorgung Die Verpackung besteht aus umweltfreund-
lichen Materialien, die Sie über die örtlichen Recyclingstellen entsorgen können.
Werfen Sie Elektrowerkzeuge nicht in den Hausmüll!
Gemäß Europäischer Richtlinie 2012/19/EU müssen verbrauchte Elektrowerkzeuge getrennt gesammelt und einer umweltgerechten Wiederver-wertung zugeführt werden.
DE│AT│CH │ 29 ■PLBS 2 A1
Werfen Sie Batterien nicht in den Hausmüll!
Defekte oder verbrauchte Batterien müssen gemäß Richtlinie 2006/66/EC recycelt werden. Geben Sie Batterien und / oder das Gerät über die ange-botenen Sammeleinrichtungen zurück.Über Entsorgungsmöglichkeiten für ausgediente Elektrowerkzeuge informieren Sie sich bitte bei Ihrer Gemeinde- oder Stadtverwaltung.
Garantie der Kompernaß Handels GmbHSehr geehrte Kundin, sehr geehrter Kunde,
Sie erhalten auf dieses Gerät 3 Jahre Garantie ab Kaufdatum. Im Falle von Mängeln dieses Produkts stehen Ihnen gegen den Verkäufer des Produkts gesetzliche Rechte zu. Diese gesetzlichen Rechte werden durch unsere im Folgenden dargestellte Garantie nicht eingeschränkt.
GarantiebedingungenDie Garantiefrist beginnt mit dem Kaufdatum. Bitte bewahren Sie den Original Kassenbon gut auf. Diese Unterlage wird als Nachweis für den Kauf benötigt.
Tritt innerhalb von drei Jahren ab dem Kaufdatum dieses Produkts ein Material- oder Fabrikationsfeh-ler auf, wird das Produkt von uns – nach unserer Wahl – für Sie kostenlos repariert oder ersetzt. Diese Garantieleistung setzt voraus, dass innerhalb der Drei-Jahres-Frist das defekte Gerät und der Kaufbeleg (Kassenbon) vorgelegt und schriftlich kurz beschrieben wird, worin der Mangel besteht und wann er aufgetreten ist.
Wenn der Defekt von unserer Garantie gedeckt ist, erhalten Sie das reparierte oder ein neues Produkt zurück. Mit Reparatur oder Austausch des Produkts beginnt kein neuer Garantiezeitraum.
Garantiezeit und gesetzliche MängelansprücheDie Garantiezeit wird durch die Gewährleistung nicht verlängert. Dies gilt auch für ersetzte und reparierte Teile. Eventuell schon beim Kauf vorhan-dene Schäden und Mängel müssen sofort nach dem Auspacken gemeldet werden. Nach Ablauf der Garantiezeit anfallende Reparaturen sind kostenpflichtig.
GarantieumfangDas Gerät wurde nach strengen Qualitätsrichtlinien sorgfältig produziert und vor Auslieferung gewissen-haft geprüft.
Die Garantieleistung gilt für Material- oder Fabrika-tionsfehler. Diese Garantie erstreckt sich nicht auf Produktteile, die normaler Abnutzung ausgesetzt sind und daher als Verschleißteile angesehen werden können oder für Beschädigungen an zerbrechlichen Teilen, z. B. Schalter, Akkus, Backformen oder Teile die aus Glas gefertigt sind.
Diese Garantie verfällt, wenn das Produkt beschädigt, nicht sachgemäß benutzt oder gewartet wurde. Für eine sachgemäße Benutzung des Produkts sind alle in der Bedienungsanleitung aufgeführten Anweisun-gen genau einzuhalten. Verwendungszwecke und Handlungen, von denen in der Bedienungsanleitung abgeraten oder vor denen gewarnt wird, sind unbe-dingt zu vermeiden.
Das Produkt ist nur für den privaten und nicht für den gewerblichen Gebrauch bestimmt. Bei miss-bräuchlicher und unsachgemäßer Behandlung, Gewaltanwendung und bei Eingriffen, die nicht von unserer autorisierten Service-Niederlassung vorgenommen wurden, erlischt die Garantie.
■ 30 │ DE│AT│CH PLBS 2 A1
Abwicklung im GarantiefallUm eine schnelle Bearbeitung ihres Anliegens zu gewährleisten, folgen Sie bitte den folgenden Hinweisen:
▯ Bitte halten Sie für alle Anfragen den Kassen-bon und die Artikelnummer (z. B. IAN 12345) als Nachweis für den Kauf bereit.
▯ Die Artikelnummer entnehmen Sie bitte dem Typenschild, einer Gravur, auf dem Titelblatt ihrer Anleitung (unten links) oder als Aufkleber auf der Rück- oder Unterseite.
▯ Sollten Funktionsfehler oder sonstige Mängel auftreten kontaktieren Sie zunächst die nachfol-gend benannte Serviceabteilung telefonisch oder per E-Mail.
▯ Ein als defekt erfasstes Produkt können Sie dann unter Beifügung des Kaufbelegs (Kassenbon) und der Angabe, worin der Mangel besteht und wann er aufgetreten ist, für Sie portofrei an die Ihnen mitgeteilte Service Anschrift übersenden.
HINWEIS
► Bei Parkside und Florabest Werkzeugen senden Sie bitte ausschließlich den defekten Artikel ohne Zubehör (z. B. Akku, Aufbewah-rungskoffer, Montagewerkzeuge, etc) ein.
Auf www.lidl-service.com können Sie diese und viele weitere Handbücher, Produktvideos und Software herunter-laden.
Service Service Deutschland Tel.: 0800 5435 111 (Kostenfrei aus dem dt. Festnetz/Mobilfunknetz) E-Mail: [email protected]
Service Österreich Tel.: 0820 201 222 (0,15 EUR/Min.) E-Mail: [email protected]
Service Schweiz Tel.: 0842 665566 (0,08 CHF/Min., Mobilfunk max. 0,40 CHF/Min.) E-Mail: [email protected] IAN 277698
ImporteurBitte beachten Sie, dass die folgende Anschrift keine Serviceanschrift ist. Kontaktieren Sie zunächst die benannte Servicestelle.
KOMPERNASS HANDELS GMBH
BURGSTRASSE 21
44867 BOCHUM
GERMANY
www.kompernass.com

5IAN 277698
KOMPERNASS HANDELS GMBHBURGSTRASSE 2144867 BOCHUMDEUTSCHLAND / GERMANYwww.kompernass.com
Estado das informações · Last Information Update Stand der Informationen: 06 / 2016 · Ident.-No.: PLBS2A1-062016-2