apostila feltragem
DESCRIPTION
Apostila de técnicas de feltragem, como utilizar a lã, feltragem de agulhada e feltragem molhada. Tecnicas para confeccionar pequenos animais de lã e confecção de quadros. Documento ilustrado.TRANSCRIPT

Cat "laranja Quente" MKToy Master Class em 8 de março de lã do aniversário do dia Felting Felting coração do gato laranja MK Plastic dos Namorados
1.Meu "Coração Laranja" !!!!!!
2.Para o trabalho que precisa dos seguintes materiais: 1. Lã (laranja, branco, vermelho, preto). 2. Esponja. 3. Felting agulha áspero, №36 * e 38 *. 4. Vários sacos de plástico. 5. Plástico branco, preto e verde. não Gerar bola muito densa dos pacotes.

3.Laranja propagação de lã na nossa bola em algumas camadas muito densas. Cada fio de ancoragem de uma agulha, um pouco perfurando o pacote para não deslizar. Acontece bolo de laranja, passe para o caso molhado.
4.Coloque em nossa bola de lã um pouco de sabonete líquido e um pouco de água. Obtendo suavemente em movimentos circulares para ensaboar o cabelo bun não se move. Depois de ver que a camada superior do cabelo emaranhado, você pode somar esforços.

5.Como o nosso trabalho lida com a bola torna-se mais denso, com tamanho reduzido. Não se esqueça de quantidade adequada de sabão e banhos periódicos em água morna.
6.Nossa bola era muito densa. Lave-o com água corrente quente.

7.Agora precisamos de uma tesoura com pontas muito afiadas.
8.Cuidadosamente cortar através de um pequeno buraco e que bolsas.

9.
10.Isso é o que eu recebo. Saindo do canto suave, de modo que eles tinham estudado o bom e bonito. A bola deve ser enviada para a bateria para secar completamente.

11.Neste momento, começa a fazer o pé. Para fazer isso, prepara quatro protuberâncias idênticas de lã.
12.Igolochkoj 36 formar as pernas.

13.E é claro que você se lembra sobre a cauda.
14.

15.Como as vedações começam a formar dedos, com duas ranhuras de partes da extremidade mais larga do pé em três partes.
16.Quando o pé está pronto, tomar a pele preta e enche o lado de trás do pé, uma almofada, com uma picada da agulha não é necessário profundo.

17.Isso é o que acontece.
18.Completamente moer um buraco para a boca.

19.Chegando a prender as pernas e a cauda para o corpo, o que deve por este tempo a secar. Você não emaranhado dicas partes do corpo raspushivaem bem e aplique no corpo, então privalivaem sua agulha 36 perfurando bola.
20.
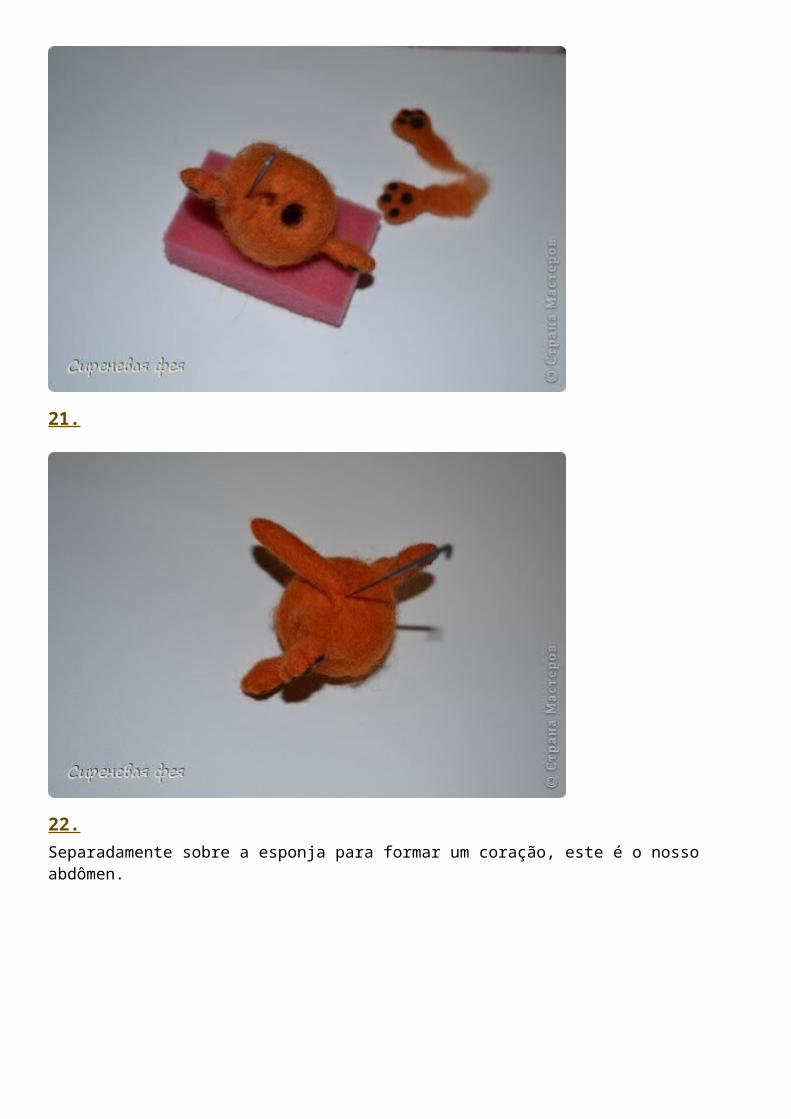
21.
22.Separadamente sobre a esponja para formar um coração, este é o nosso abdômen.

23.Agora vire e língua.
24.Privalivaem cana. Olhos e nariz são feitos de plástico e colado sobre a cola. Para ser coberto com brilho transparente unha polonês em 2 demãos. acho que alguma coisa está faltando? Orelhas! Valya ouvidos.

25.Quando os ouvidos estão prontos, começam privalivat-los ao corpo, da mesma forma como nós privalivali patas e cauda, sem se esquecer de mascarar as articulações com finos fios de lã.
26.Tum cardíaca.

27.E aqui está o nosso gato está pronto!

Karina lã "Gato nas flores" + MKInterior pintura desenho Masterclass aniversário Felting Felting lã Karina Gatinho em flores + MK Lã mural
1.Me inspirou a criar esta obra de Julia Oslavskoy http://stranamasterov.ru/node/175559 Eu queria criar algo semelhante a lã. O resultado foi satisfeito.
2.Isso é o que eu usei no trabalho: lã feltragem (marrom, branco, dois tons de verde), feltragem de agulha para a parte grossa e fina de inserções de espuma espuma inserir uma esponja ou um tamanho adequado, papelão, argila do polímero (você pode usar qualquer plástico), tinta acrílica, pastel , pincéis, palitos e cola. Bem sootvetvuyuschego tamanho do quadro.

3.Fabricação de gato. Para começar, corte um molde de papelão (I ispolzovla cobrir do velho notebook em geral).
4.Postado em padrão de cabelo castanho ...

5.Em torno de mentir ... e uma agulha grossa.
6.Em seguida, removido o modelo e rasgou a peça de inserção de espuma inserções de espuma. Isto é o que aconteceu:

7.Lã adicionada, onde ele é necessário. Por exemplo, o pé está ligado muito curta e tinha a alongá-lo.
8.Em seguida, uma agulha pequena borda da peça processada que daria forma e começou a construir-se o volume, agulha periodicamente e mãos que dão a forma da peça desejada.
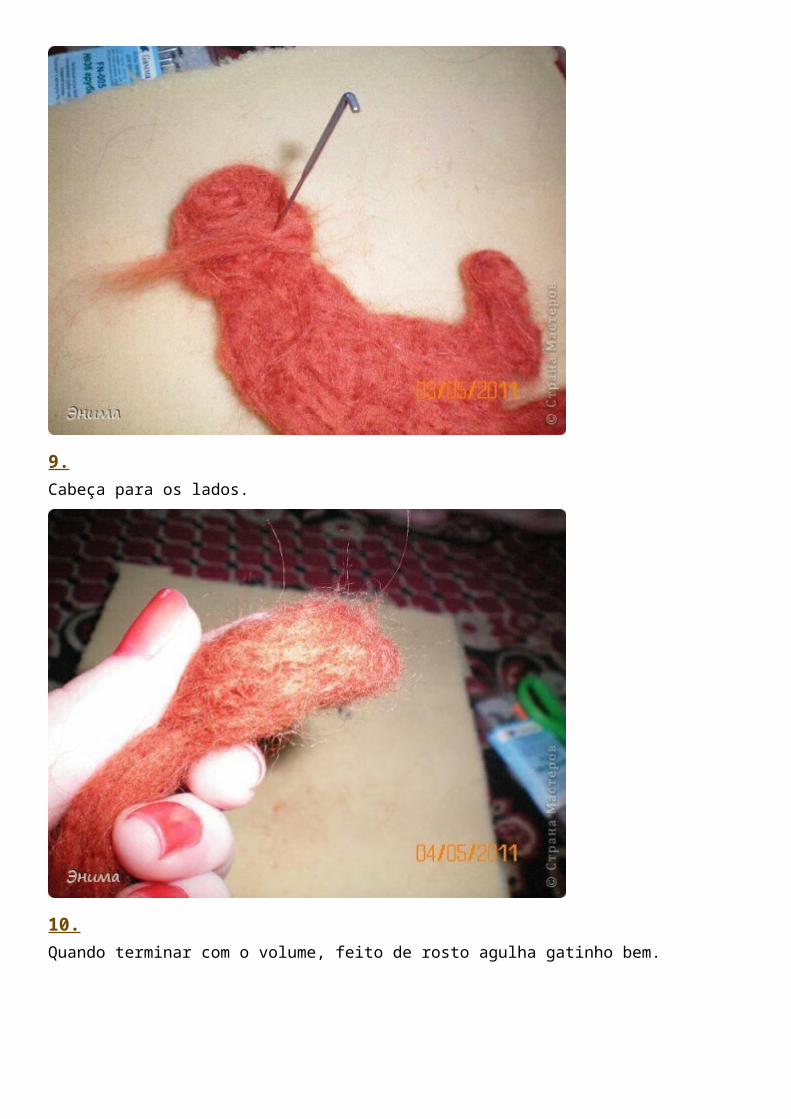
9.Cabeça para os lados.
10.Quando terminar com o volume, feito de rosto agulha gatinho bem.

11.Depois acrescentou, lã branca, que você deve usar uma agulha fina.
12.Feito o topo das segundas pernas traseiras.

13.Eis o que aconteceu. Peça levemente lixada com uma agulha fina, que não Tochal lã. Muito moagem não é necessário, de outra forma, então ele irá ser difícil de fixar de vedação sobre a pintura.
14.Preguiçoso os outros três pernas.

15.Não se esqueça de tentar.
16.Sobre as patas traseiras de uma só vez prikelivayu almofadas feitas de argila do polímero.

17.
18.Orelhas triangulares preguiçoso.

19.Prenda as orelhas eo pé da frente.
20.Do olhos e nariz do polímero e tintas acrílicas Golin raskarshivayu. As almofadas em suas patas traseiras também pintar. Aperte o pé atrás.

21.Agulha grossa emaranhado de flores, que interpreta Mike Farley.
22.Com a ajuda de um pouco de cabelo verde privalyala agulha fina na base da flor (como sepal) eo mesmo caule grosso pridelela agulha do fio Mullin (a ponta da linha empurrado para a peça, você pode se ater apenas a haste)

23.Em seguida, uma agulha fina privalivayu muito cuidadosamente flor para a frente do pé. A principal coisa a enfiar uma agulha, sem fanatismo que não subiu lã vermelha nas patas storoy fora.
24.Privalivayu segundo pé da frente para trás para as juntas de base e os dedos do pé esta agulha muito fina, também muito limpo e otorozhno privalivayu a flor.Isso é o que vai sair:

25.Gatinho é posto de lado e fazer o karitny ou fundo básico. Para fazer isso, levou um casaco branco e colocou-a sobre a espuma sob a forma de um retângulo do tamanho desejado dos meus três camadas: 1 - horizontal, 2 vertical; 3 - novo na horizontal.
26.O resultado de tal retângulo com bordas irregulares.

27.Agulha fina em branco um pouco fora, apenas para manter a forma e não desmoronar. Com muito cuidado arrancar a peça com espuma, o principal é não esticar ou deformar.
28.Materialmente me preparar para a pintura, ou melhor tonificação. Vou coloração laranja pastel, e roxo e azul lápis de cor, na ausência de tal cor pastel. Pastéis e lápis faca e raspe com um pincel macio e seco, com cuidado colocado na fundação. By the way, um lápis bem estabelecida, se alguém não tem pastéis, você pode usar lápis de cor. Nos lugares em que você precisa para tornar a cor mais brilhante e mais fácil de aplicar dedo lápis.

29.Eis o que aconteceu. Para confiabilidade polvilhado base hairspray. Todos base está pronta, salve-o, também ...
30.Aceito ... e deixa para feltragem. Folhas cheio o modelo (fazer vários modelos de diferentes tamanhos) com uma agulha fina.

31.Espalhe uma camada de lã dentro do modelo e de despejo. Então eu tomar listras tnkie pilha de lã seu loop, espalhar estas laçadas na borda de uma folha, onde as projeções e privalivayu (espero eu escrevi claro). A seu critério, pode adicionar outra camada de lã, mas note que as folhas fazer melhor fina.
32.Eu remover o modelo. O resultado é algo peludo, verde, vagamente reminiscente do folheto.

33.Primeira borda brabatyvayu, em seguida, moer agulha fina.
34.Da mesma forma, fazer a quantidade certa de folhas.

35.Cego de flores da argila do polímero e galhos e pintá-los com tintas acrílicas. Em seguida, ele cobriu a unha polonês transparente, como um verniz especial não está na nossa cidade para obtê-lo não é fácil.
36.Pré-montagem com o contorno. Um quadro é melhor comprar os mais simples, claro, que não iria sobrecarregar os detalhes do produto. Raminhos de flores eu só colado.

37.Tinta acrílica com um palito em uma folha veias. Você pode puxar uma folha, e pintar o priklayvat no lugar, que não iria esquecer de onde a folha é.
38.Folhas brilhantes entre o pastel veias Tonir.

39.Quando as folhas estão prontas para tomar o seu lugar karitne, arrumar o gatinho, eu limpo o quadro e privalivayu deixa a imagem de fundo aqui e ali para o outro.
40.Em seguida, definir o lugar de Mike Farley e privalivayu no limite.

41.Em seguida, inverter a imagem e parte de trás do privalivayu base para o gato. A principal coisa é não furar através selos, ou lã da base vai sair e vai ficar com o gatinho.
42.Privalivayu agulha fina no fundo da grama em um pedaço de fundo entre o pé de trás e hvostikoi privalivayu lã verde-escuro, e inserir a imagem no quadro.Folhas, que se estendem para além dos quadros de confiabilidade prikleyvayu ao quadro com cola.

43.Colando flores e - voila! - A pintura está pronta.

TAPETE


VIRAR E DOBRAR A LÃ

TORCER E ENXAGUAR
OLHOS DE PLASTICO COSTURADOS

QUADRO GATO
Imagem tirada da coleção de A. Fedorova.

2.Para trabalhar vai precisar de: a) quadro com vidro 20 * 20, b) de flanela ou lã tamanho quadro, c) cola PVA, g) uma tesoura afiada, etc) 5 cores de lã (vermelho, amarelo, preto, branco, amarelo-claro) e) Pinças (usando Nariz Bent)
Então começar: 1) divulgar a estrutura e sobre a entretela cola à base de placa (isto é feito para que a lã não deslizar e não fugiu com a placa); 2) começar a lançar as bases longos fios (5-7 cm) de lã vermelha (lay out horizontalmente). Chamo a vossa atenção para o fato de que cada nova camada precisa ser conectado com os outros - isso é fundamental - capa com uma moldura de vidro. (Então, você vai ver imediatamente um padrão de urso e onde é necessário adicionar ou remover a cor.)

3.O círculo preto cabelos emerge, criando o efeito da névoa do sol

4.Amarelo escuro nuvens empate lã (usando fios de luz transparentes) cachos amarelos impostas à beira de uma cor preta para combinar. (Assim, a imagem vai ser gentil e não contrastantes)
5.Fazendo o sol: é a partir de lã amarelo claro puxar um fio de gordo e hera entre as palmas das mãos. da tesoura panqueca resultantes cortar em volta do sol. Substitui par sol de pryadok amarelo escuro.
não se esqueça de cobrir o vidro :)

6.O acabado sol pryadok adicionar algum branco (apenas ligeiramente sobrepostos uma base de vermelho e preto obter o efeito dos raios luminosos.) Obtendo desenho do gato: ele é puxado para fora de finos fios de lã preto e torcê-los entre as palmas das flagelos pulmões. Próxima pinças espalhar gato loop.para facilidade de uso não longos fios. (Eu cortei tesoura)

7.Em seguida mais rápido - * corte *. Para fazer isso, pegue um pedaço de papel, tesoura e cabelo - e cortar o comprimento de lã preta de 1,5-2 mm. pinças e agora transferi-lo para a nossa imagem - enchimento, enchendo de cor do gato.

8.Coberto com vidro, verifique se não há cor vermelha se destacou em qualquer lugar do gato. se encontrarmos - adicionar a esse lugar de peles.
Próxima vidro lixivi�el, e cobrir a nossa imagem. colocar e sufocar frame - admire :)

9.Entendemos que é muito fácil de pesquisar e inet em busca de novas fotos :)
Boa sorte para você !!!

TUTORIALS - Felting FlowersHere will be tutorials for two different styles of flower. I have written them so that they can easily be followed (hopefully) by someone with little or no felting experience. Experienced felters will get the idea just from the pictures and a quick scim over the instructions :)
The first tutorial is for flowers with a stem

You will need:· Merino wool tops/roving - green for the stem + 2 flower colours· Silk fibre - I used sari silk fibre· Bubble wrap· Elastic bands, or pieces of tights/pantyhose legs to use as ties· Beads - optional· Brooch backs - optional· A towel· Soap and/or washing up liquid· Warm water· Scissors· Thin plastic, cut from a carrier bag or similar - size 10” x 10” (25cm x 25cm)

For sprinkling water onto the wool fibre I have a special tool with a water sprinkler, simply because I do
a LOT of felting. You can use a plastic pop bottle, or small milk carton with a couple of holes poked in
the lid, to sprinkle water. Or you can scatter it with a spoon, or drip it off your fingers.
1. Place the towel on to your work surface. Fold your bubble wrap in half with the bubbles on the inside and place it on top of the towel, now open the bubble wrap (you will need to fold it back over the flower in a moment so please don’t move it).
2. Decide what length you want the stem to be. Remember it will shrink!
Break off a suitable length of green fibre. You don't want it too thin or too thick.. I find that when using merino tops if I separate them along the length into two equal pieces they are just right.
3. Fill a jug or mug with very warm water and add washing up liquid to it. No more than ½ a teaspoon per pint of water. Alternatively put your bar of soap in the warm water and leave till it goes cloudy.
4. Carefully place the green fibre into the soapy water - keeping about 3” at one end completely dry!
5. As you take the fibre back out of the water you must be careful it doesn’t separate due to the weight of the water. Hold the fluffy end in one hand, position the other hand about an inch from the surface of the water and gently draw the fibre between the fingers of that hand to remove some of the water. We want it wet, but not soaked.

6. Once the fibre is out of the water dry your hands. Lay the stem over the palm of one hand so the fluffy end is just hanging over, place the other hand on top and gently roll the stem between the palms of your hands 20 times increasing pressure as you go. Now move along to the next bit of stem and repeat the process, do this all the way along – be sure to keep the fluffy end dry.
7. Continue rolling between your palms like this until the stem is firm - if you have a small rush mat / sushi mat, rolling the stem in them works very well.
8. Take the piece of thin plastic and cut a hole in the centre just big enough for the stem to go through. Pass the stem through the plastic until the plastic is right behind the fluffy end, now lay it down on the bubble wrap so the stem is underneath the plastic and the fluffy end is on top. Now spread that fluffy end out so it radiates out from the stem in a circle. This will root into the base of the flower – when you place the petals make sure to centre them where the stems is.

9. Decide which of the colours will be the base colour of your flower (this will be col.1). Hold the fibre approx. 6” (15cm) from the end with one hand. With your other hand gently grasp the tips of the fibre and pull. Keep pulling steadily until the fibres you are holding have detached from the rest.
10. Pinch the tips at one end of the tuft together and place the pinched end right over the stem (at the centre of the green fluff circle).
11. Pull another tuft of fibre, pinch the end and position next to the first, touching but not overlapping. Repeat this process until you have a continuous circle of petals.
12. Take your second petal colour (this will be col.2) and pinching between thumb and forefinger pull a

small tuft of fibre. Again pinch the tips at one end and place them in the centre of the circle, this tuft should lie over the join of the previous petals – repeat all the way around.
13. From col. 1 pull a small tuft, gently tease it apart sideways, so it spreads out and is more wispy than the others – do not pinch the end. Place tuft on the outside edge of the circle, on top of the previous tufts. These tufts will not reach the centre of the flower, which is ok, we only want these on the outside edge of the petals. Continue placing all the way round the circle.
14. Take col. 2, pull a small tuft and tease it gently apart so it is wispy, lightly pinch one end and place the pinched end in the centre of the flower. Repeat all the way around (should only take 2, maybe 3 tufts).
15. Pull out some sari silk fibre and chop it into short lengths with your scissors. Sprinkle the silk over the top of the flower, I like to place a dark colour, often green, in the centre.
16. Sprinkle warm soapy water onto the flower, starting in the centre and working your way outwards. You want it to be thoroughly wet, but not swimming.

17. Fold the bubble wrap back over the top of the flower and gently press down to ensure the flower is evenly soaked.
18. Sprinkle some water onto the bubble wrap and get your palms soapy. Gently smooth the bubble wrap over the flower making sure there are no air pockets. Now start rubbing your hands in small gentle circles, you need to thoroughly rub every part of the flower – this should take about 2 minutes.
19. Pull the bubble wrap back and carefully straighten the flower up if necessary. If you have wayward fibres sticking out from the edges carefully fold them back over the flower petals.

20. Put the bubble wrap back over the top and turn it over (so you are looking at the other side of the flower through the bubble wrap.
21. Repeat step 19 and 20.
22. Still keeping the flower sandwiched in between the bubble wrap, with the stem coming out at one side. Starting at the edge closest to you roll the bubble wrap up, roll it all the way up and secure with elastic bands.
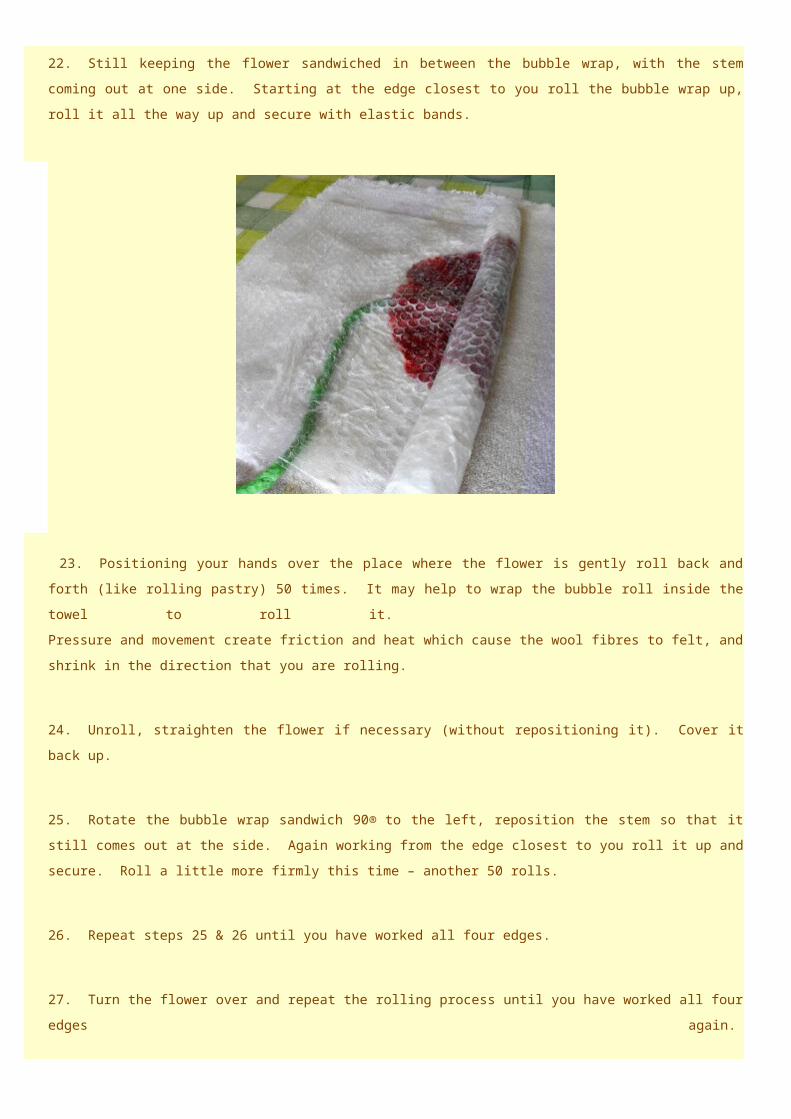
23. Positioning your hands over the place where the flower is gently roll back and forth (like rolling pastry) 50 times. It may help to wrap the bubble roll inside the towel to roll it. Pressure and movement create friction and heat which cause the wool fibres to felt, and shrink in the direction that you are rolling.
24. Unroll, straighten the flower if necessary (without repositioning it). Cover it back up.
25. Rotate the bubble wrap sandwich 90® to the left, reposition the stem so that it still comes out at the side. Again working from the edge closest to you roll it up and secure. Roll a little more firmly this time – another 50 rolls.
26. Repeat steps 25 & 26 until you have worked all four edges.
27. Turn the flower over and repeat the rolling process until you have worked all four edges again.
28. The flower should be pretty well felted by now. It is time to shape it! Hold the stem gently in one hand, now pull the stem until the head of the flower is in the palm of your hand. Roll back and forth between your hands 20 times, and throw it HARD onto the work surface (this shocks the fibres and speeds up the final felting stage). Straighten flower, gently stretching the petals sideways as you go. By doing this you will get a nice ruffled, rippling flower.

29. Hold the stem in one hand and again pull until the head of the flower is in the palm of your hand held in a light fist. Gently using a finger from the other hand - poke the petals down into the centre. Now roll it between your hands like you are making a clay ball – roll it 20 times then throw it down onto the work surface a couple of times.
Unroll the flower and use your fingers to massage and stretch the petals into the shape you want them to be.
30. Repeat step 28 applying most pressure at the base of the flower, repeating step 29 one more time. After each repeat stretch the petals into shape! The flower should feel sturdy and well felted, and you are hopefully happy with the shape.
31. Rinse thoroughly. Alternating between hot and cold water for the rinses will harden the felt even more. Squeeze out excess water.
32. Manipulate the petals into a pleasing position and leave to dry. Felt has ‘memory’ it will remember the shape that it dries in and stay that way.

My daughter wearing one as a corsage
You can make these long enough to wear as a necklace, belt or headband. Make them a little smaller and daintier and use as napkin rings - imagine how lovely they would be used at a Wedding Breakfast. Or make a short stem and stitch a brooch pin to the back to wear as a brooch. One Mothers Day I felted a bouquet of these (with very stiff stems) for both of our Moms.. they loved them :)

Enjoy!
Tutorial No.2Flowers with Petals
You will need:
Merino wool fibre Sari silk fibre Bubble wrap Soap / washing up liquid Warm water Elastic bands / pieces cut from tights/panty hose legs to use as ties Beads Brooch back Towel Scissors
For sprinkling water onto the wool fibre I have a special tool with a water sprinkler, simply because I do
a LOT of felting. You can use a plastic pop bottle, or small milk carton with a couple of holes poked in

the lid, to sprinkle water. Or you can scatter it with a spoon, or drip it off your fingers.
1. Place the towel on to your work surface. Fold your bubble wrap in half with the bubbles on the inside and place it on top of the towel, now open the bubble wrap (you will need to fold it back over the flower in a moment so please don’t move it).
2. Decide which of the colours will be the base colour of your flower. Hold the fibre approx. 6” (15cm) from the end with one hand. With your other hand gently grasp the tips of the fibre and pull. Keep pulling steadily until the fibres you are holding have detached from the rest.
3. Fold about one third of the tuft of fibre back on itself, and gently manipulate the fibres into a teardrop shape.
This is your first petal; place it on the bubble wrap. The point of the teardrop will be at the centre of the flower so be sure to position it on the bubble wrap with room for the rest of your petals.
4. Repeat the previous step four more times. Now you have five petals, just touching in the centre.

5. Pick up the fibre in the colour you want to use for the centre of your flower. Again hold it 6” from the end, this time pinch some fibres between thumb and fore finger.. so you are drawing off a much smaller tuft.
6. These tufts will hold your petals together. Place a tuft across the centre of the flower so one end of the tuft is half way up one petal, crosses the centre of the flower and on to the opposite petal, where it will go about half way up. Do this for each petal.
7. Take your third colour and pull a small tuft (as in last step) use this wherever you wish to add a highlight to the petals. Use scissors to cut short pieces of fibre from the tuft if needed.
8. Pull out some sari silk fibre in which ever colour you fancy (I often use two or three colours, one for the petals and the others mostly in the centre). Use the scissors to chop short lengths and sprinkle on top of the flower.

9. Fill a jug or mug with very warm water and add washing up liquid to it. No more than ½ a teaspoon per pint of water. Alternatively put your bar of soap in the warm water and leave till it goes cloudy.
10. Sprinkle warm soapy water onto your flower.
11. Fold the bubble wrap back over the top of the flower and gently press down to ensure the flower is evenly soaked and there are no air pockets in between the fibre.
12. Sprinkle some water onto the bubble wrap and get your palms soapy. Gently smooth the bubble wrap over the flower making sure there are no air pockets. Now start rubbing your hands in

small gentle circles, you need to thoroughly rub every part of the flower – this should take about 2 minutes.
13. Pull the bubble wrap back and carefully straighten the flower up. If the petals seem to be joining up use the scissors to cut between them – don’t go into the centre of the flower.
14. Put the bubble wrap back over the top and turn it over (so you are looking at the other side of the flower through the bubble wrap.
15. Repeat step 12 and 13.
16. Still keeping the flower sandwiched in between the bubble wrap. Starting at the edge closest to you roll the bubble wrap up, roll it all the way up and secure with elastic bands / ties.

17. Positioning your hands over the place where the flower is gently roll back and forth (like rolling pastry) 50 times. It may help to wrap the bubble roll inside the towel to roll it.
18. Pressure and movement create friction and heat which cause the wool fibres to felt, and shrink in the direction that you are rolling.
19. Unroll, straighten the flower if necessary (without moving it). Cover it back up.
20. Rotate the bubble wrap sandwich 90® to the left. Again working from the edge closest to you roll it up and secure. Roll a little more firmly this time – another 50 rolls.
21. Repeat steps 18 to 20 until you have worked all four edges.
22. Turn the flower over and repeat the rolling process until you have worked all four edges again.
23. The flower should be pretty well felted by now. It is time to shape it! Make a circle from the thumb and fore finger of one hand and place the flower over the top. Gently using a finger from the other hand - poke the flower centre down into the palm of your hand, then push the petals into the centre. Now roll it between your hands like you are making a clay ball – roll it 20 times then throw it,

hard, down onto the work surface a couple of times (this shocks the fibres and speeds up the final stage). Unroll the flower and use your fingers to massage and stretch the petals into the shape you want them to be.
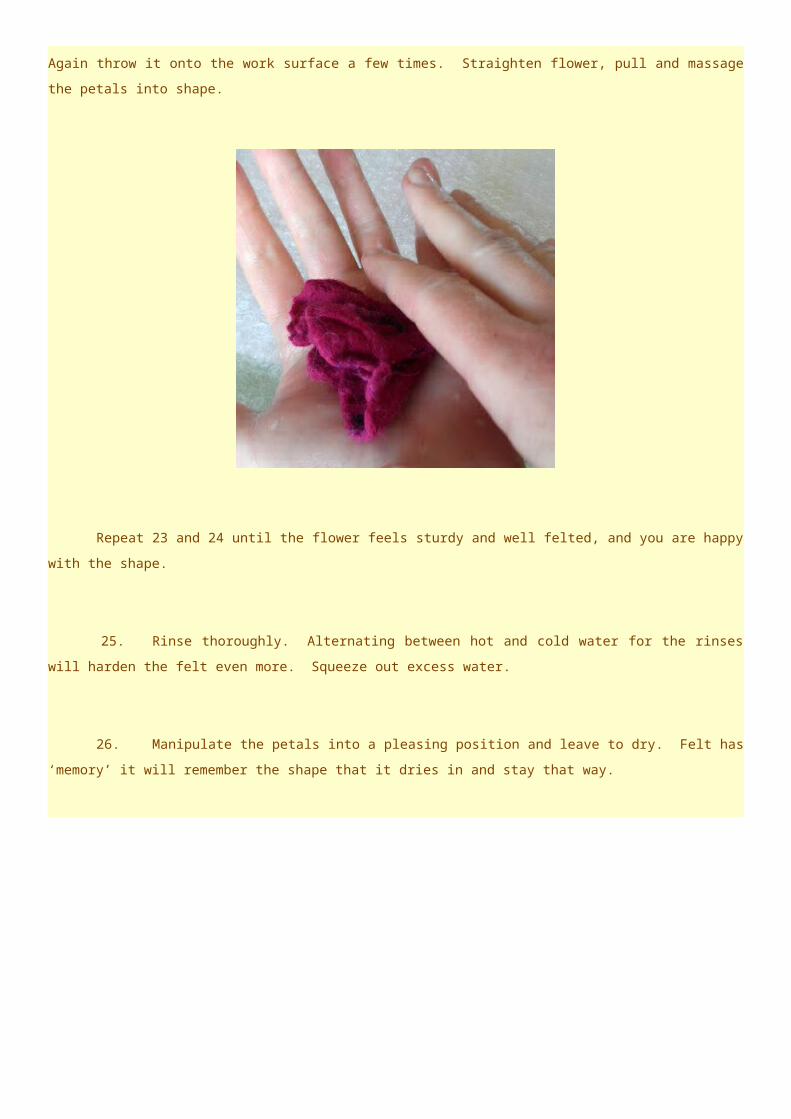
24. Position the flower over thumb and fore finger as in 23, poke the centre into the palm of your hand leaving the petals sticking out. Roll back and forth between your hands 20 times, paying particular attention to the centre of the flower. Again throw it onto the work surface a few times. Straighten flower, pull and massage the petals into shape.

Repeat 23 and 24 until the flower feels sturdy and well felted, and you are happy with the shape.
25. Rinse thoroughly. Alternating between hot and cold water for the rinses will harden the felt even more. Squeeze out excess water.
26. Manipulate the petals into a pleasing position and leave to dry. Felt has ‘memory’ it will remember the shape that it dries in and stay that way.
1 layer of petals.. crumpled slightly to dry
You can make one, two or three layers of petals. For multi layered flowers I like to crinkle the petals up more as in the above picture, this makes the flower more interesting and fuller rather than being flat.
Finishing off:
1. Thread a fine needle (a fine beading needle is best for tiny seed beads) with complementary colour cotton, and tip the beads out into a saucer so you can see them easily.
2. I like to decide how my beads will look before I start sewing them on by popping pinches of beads into the centre of the flower, deciding roughly how many and where I want them to be. Then tip the beads back in the saucer and start sewing them on one at a time.
3. Finish off by sewing the brooch back on.
TIP: The nice thing with multi layered petals is that you can easily hide the ugly part of the brooch pin!
Make 2 small cuts through the bottom petal centre,positioned where the ends of the pin are and just
big enough to push them through. Position the bar on the inside where it will be sandwiched between
the petal layers, with just the operational parts of the pin sticking out the other side.
NOTE: I sew the brooch back on, then assemble the petal layers and finally sew the beads on. I join
all the layers while I am sewing the beads on.. you can do it separately if you prefer.

You can make many different flowers from the same basic method. By using more or less layers and by changing petal shape.
Once you have mastered the basic flower you may wish to try some variations..
A. Half way through the felting process carefully cut each petal in to two, only go half way down the petal. Finish off felting in the normal way and you will have pretty bifurcated petals.
B. Instead of laying out five individual petals, lay them out so the edges are touching and allow them to felt together into a circle. Half way through the felting process cut into the petal leaving a 2cm circle at the centre which you do not cut into. Make cuts approx. 1cm apart all the way round the outside of the circle. Carry on felting as per usual and you will end up with a daisy like flower. A multi layered flower made up of these daisy type petals can be very interesting, especially when beaded.
